Should I Repair Or Replace My Air Conditioner?

Air conditioners are a necessary part of North Texas homes. We can’t live without cool and comfortable living spaces during the hot summer months. However, air conditioners can experience wear and tear and require repairs or even replacement over time. The decision to replace or repair an air conditioner can be a challenging one, as it involves weighing various factors such as cost, efficiency, and even environmental impact.

To help you make the right decision, we’ll explore the signs that indicate whether your air conditioner needs repair or replacement, the factors you should consider when making this decision, and the advancements in HVAC technology that may influence your choice. We will also provide resources and expert advice to help you make an informed decision. Whether you are dealing with a malfunctioning compressor or considering upgrading to a more energy-efficient system, this article will provide the information you need to navigate the repair or replace dilemma. The information we provide here is based on the decades of knowledge from our HVAC tech at Dallas Heating and Air Conditioning.

Key Takeaways

  • Air conditioners need repairs and replacements over their lifetime, and the decision to repair or replace depends on the cause and extent of damage, as well as the age of the unit and cost of repairs.
  • Advancements in HVAC technology, such as digital systems, smart thermostats, and zoning technology, can help improve energy efficiency and personal comfort.
  • When deciding whether to repair or replace an air conditioner, factors to consider include the age of the unit, the availability of parts, the cost of major components, SEER ratings, and long-term warranties.
  • Safety should always be a top priority, and HVAC systems over 10 or 15 years old should be considered for replacement. It’s also important to research and read reviews when hiring an HVAC company, and to consider seasonal maintenance schedules and cost to run different types of air conditioners.

Signs Your Air Conditioner Needs Repair

This section will discuss several signs that indicate when your air conditioner may need repair. These signs include warm air coming from the AC vents, a leaking refrigerant, the AC unit constantly running, unusual noises, and insufficient airflow. It is important to consider these signs when deciding whether to repair or replace your AC unit.

Warm air coming from the AC vents

The presence of warm air coming from the AC vents could be an indication of a malfunctioning component or a clogged air duct, which may require repair or replacement depending on the extent of the damage and the age of the unit. In some cases, a refrigerant leak may cause warm air to come out of the vents. Fixing this issue is relatively easy, and it may not require a full replacement of the unit. However, if the compressor is the culprit, it may be more cost-effective to replace the unit altogether.

Insufficient airflow is also a common cause of warm air coming from the AC vents. This issue can be caused by blocked or clogged air ducts, dirty filters, or damaged parts. In some cases, these issues can be fixed with a simple repair. However, if the unit is old and the cost of repairs multiplied by the age of the unit exceeds the cost of a new unit, replacement may be the more practical option. Ultimately, the decision to repair or replace an air conditioner depends on the cause and extent of the damage, as well as the age of the unit and the cost of repairs.

AC unit leaking refrigerant

A common issue with air conditioning units is the leakage of refrigerant, which can be resolved with a simple fix by a professional HVAC technician. Refrigerant is an essential component of the AC unit as it removes heat from the air to provide cool air. When refrigerant leaks, it reduces the cooling capacity of the unit and causes it to work harder, leading to higher energy bills.

To fix a refrigerant leak in an AC unit, our HVAC technician will first locate the source of the leak, which can be caused by factors such as corrosion, vibration, or improper installation. Once the leak has been identified, the technician will repair it and recharge the refrigerant to the correct level. It is important to address refrigerant leaks promptly as they can cause damage to the compressor, which can be a costly repair. Additionally, if the AC unit is older and has a refrigerant leak, it may be a sign that it is time for air conditioner replacement instead of repair, especially if the repair costs exceed the value of the unit and it is nearing the end of its expected lifespan.

Air conditioner constantly running

One common issue that homeowners may experience with their HVAC system is when the air conditioner continuously runs, which can lead to higher energy bills and potential damage to the unit. There are several reasons why an air conditioner may constantly run, including restricted airflow, a malfunctioning thermostat, or a refrigerant leak. In some cases, the issue may be resolved through simple maintenance tasks, such as replacing air filters or cleaning the coils. However, if the problem persists, it may be time to consider air conditioner repair or replacement.

Restricted airflow is a common cause of an air conditioner constantly running. This can be caused by clogged air filters, dirty coils, or blocked ductwork. It is important to address restricted airflow as soon as possible, as it can lead to reduced energy efficiency and even damage to the unit. In some cases, air conditioner repair may be sufficient to resolve the issue. However, if the unit is old or has other underlying problems, it may be more cost-effective to replace it with a newer, more energy-efficient model. Homeowners should weigh the cost of repairs versus replacement, as well as the potential energy savings, when making their decision.

Unusual noises

Unusual noises emanating from an HVAC system may indicate the presence of loose, worn out or damaged components that require immediate attention from a professional technician to prevent further damage to the unit. Common sounds that may indicate AC issues include grinding, squealing, hissing, clunking, and rattling. These noises can be caused by a range of factors, including compressor issues, restricted airflow, or loose parts. In some cases, minor repairs may be sufficient to fix the issue, but in other cases, the repair costs may exceed the cost of replacement.

When unusual noises are heard coming from an HVAC system, it is essential to contact a professional technician to diagnose the issue. Delaying repairs can lead to further damage and increased repair costs. If the issue is related to a loose or damaged component, repairs may be sufficient. However, if the compressor is the culprit, replacement may be necessary. In some cases, the cost of repairs may exceed the cost of replacement, making replacement a more cost-effective option in the long run. Ultimately, the decision to repair or replace an HVAC system depends on the extent of the damage, the age of the unit, and the cost of repairs.

Insufficient airflow

Insufficient airflow within an HVAC system can lead to decreased efficiency, increased energy bills, and a less comfortable living environment. Restricted airflow may result from clogged or blocked air ducts, dirty air filters, damaged fan blades, or faulty motors. In some cases, these issues can be resolved through routine maintenance, such as replacing air filters and cleaning air ducts. However, if the problem persists, it may be necessary to seek professional air conditioner repair or replacement services.

Restricted airflow can also impact AC unit performance and increase the frequency of breakdowns. When air cannot flow freely through the system, the AC unit must work harder to cool the space, putting additional strain on the system and potentially leading to costly repairs. In some cases, it may be more cost-effective to replace the AC unit if the cost of repairs multiplied by the age of the unit exceeds the cost of a new unit. Ultimately, the decision to repair or replace an AC unit depends on the cause and extent of damage, as well as the age of the unit and its overall performance.

Signs Your Air Conditioner Needs Replacement

When considering whether to repair or replace an air conditioner, there are several key factors to consider, including energy bills that continue to rise, the unit no longer performing as expected, repair costs that approach or exceed the cost of replacement, and the age of the unit exceeding its life expectancy. These factors can all contribute to the decision to replace an air conditioner rather than continuing to repair it. It is important to weigh the costs and benefits of each option before making a final decision.

Energy Bills are Constantly Increasing

The increase in energy bills may be a sign that it is time to replace your central air unit, especially if the unit is older than 15-20 years and requires costly repairs. As air conditioners age, they become less energy-efficient, leading to higher utility bills. Additionally, older units may require more frequent repairs, which can add up quickly and outweigh the cost-effectiveness of continuing to repair the unit.

When considering whether to repair or replace your air conditioner, it is important to evaluate the energy efficiency of the unit. Newer air conditioners are designed to be more energy-efficient, meaning they use less energy to cool your home and can help lower your utility bills. In contrast, older units may require more energy to operate, leading to higher utility bills. Ultimately, the decision to repair or replace your air conditioner should be based on the cost-effectiveness of each option, taking into account the age of the unit, the cost of repairs, and the potential energy savings of a new, more energy-efficient unit.

AC Unit is no Longer Performing as Expected

If an air conditioning unit is no longer meeting performance expectations, it may be necessary to evaluate the cause and potential solutions for addressing the issue. One common reason for an AC unit not performing as expected is compressor issues. The compressor is responsible for circulating refrigerant throughout the unit, and if it fails, the unit may not cool properly or may not cool at all. In some cases, the compressor may be repairable, but if it is beyond repair or the cost of repair is too high, replacing the entire unit may be the best solution.

Another reason for an AC unit not performing as expected is restricted airflow, which can be caused by blocked or clogged air ducts or dirty air filters. This can lead to insufficient cooling or uneven cooling throughout the home. In some cases, restricted airflow can be remedied by cleaning or replacing air filters, but if the problem persists, it may be necessary to evaluate the ductwork and potentially replace it. When faced with the decision of repair vs replacement, it is important to consider the cause and extent of the problem, as well as the age of the unit and the cost of repairs. In some cases, it may be more cost-effective to replace the unit rather than continuing to repair it.

The Cost of Repairs Nears or Exceeds the Cost of Replacement

As mentioned earlier, one sign that your AC unit needs to be replaced is when it is no longer performing as expected. However, another important factor to consider is the cost of repairs versus the cost of replacement. If the cost of repairs nears or exceeds the cost of replacement, it may be more practical to replace the unit altogether.

When considering the cost of repairs versus replacement, it is important to take into account the age of the unit and its service life. If the unit is already nearing the end of its service life, it may be more cost-effective to replace the unit instead of constantly repairing it. Additionally, constantly repairing an old unit may also pose safety risks and could potentially be an environmental hazard. To help you make a decision, here are three nested bullet points to consider:

  • Repairing an old unit may only be a short-term solution and may end up costing more in the long run.
  • This is especially true if the unit is already past its service life or if the repair costs are already nearing the cost of a new unit.
  • Replacement units are often more energy-efficient and cost-effective in the long run.
  • Newer units often come with better energy-saving features and may even qualify for rebates and incentives from manufacturers and utilities.
  • The cost of a new AC unit may seem high, but it will save you money and hassle in the long run.
  • Replacing the unit may be more practical than constantly repairing it, especially if the unit is already old and frequently breaking down.

The AC unit is older than its life expectancy

An important factor to consider when evaluating the performance of an AC unit is its age and whether it has exceeded its expected lifespan. On average, an AC unit has a lifespan of around 15 years, but well-maintained systems can last up to 20 years. However, as the unit ages, repairs become more frequent and major component repair costs can add up quickly. Outdated technology can also make repairs more difficult and costly. In such cases, it may be more cost-effective to replace the unit rather than continue to repair it.

While repairing an older AC unit may seem like a cheaper option in the short-term, it may not be the most financially sound decision in the long-term. As the unit ages, it becomes less efficient and reliable, resulting in higher energy bills and more frequent repairs. Additionally, outdated technology may not provide the same level of comfort and convenience as newer models. Considering factors such as major component repair costs and outdated technology, it may be more financially responsible to opt for air conditioner replacement rather than continuing to repair an outdated and inefficient unit.

Factors to Consider

Factors to consider when deciding to repair or replace an air conditioner include the age of the unit, cost of repairs, availability of parts, SEER rating, and efficiency. The average lifespan of an air conditioner is around 15 years, but well-maintained systems can last 20+ years. Major components of an air conditioner are the compressor, evaporator/indoor coil, and condenser/outdoor coil. The electrical system and smaller components also play a role in the air conditioner’s functioning.

Efficient air conditioners can help lower energy bills, and proper maintenance, refrigerant levels, and sizing also affect efficiency. The SEER rating affects the efficiency of air conditioner systems. Dehumidification, noise, and location can also affect the decision to repair or replace. Cost-effectiveness is an important factor to consider, as repairing an air conditioner can be costly and may exceed the cost of replacement. Availability of parts varies, and a good HVAC company can educate on availability for older systems.

Average Costs to Repair Major Components

The cost of repairing major components of an air conditioner can be significant, with compressor replacement averaging around $2000+, evaporator replacement averaging $1500+, and condenser replacement averaging $1700+. Smaller components such as contactors, capacitors, and fan motors can also add up to a significant repair bill. It is important to consider the age of the unit and the cost of the repairs when deciding whether to repair or replace the air conditioner.

If the cost of repairs multiplied by the age of the unit exceeds the cost of a new unit, it may be more economical to replace the air conditioner. Additionally, if the air conditioner is older than 15-20 years, it may be more cost-effective to replace rather than repair. Refrigerant leaks are an easy issue to fix, but if the refrigerant is R22, which is illegal to produce and expensive, it may be more feasible to replace the unit. Ultimately, the decision to repair or replace the air conditioner will depend on the extent of the damage and the cost of repairs compared to the cost of a new unit.

Pros and Cons of Repairing an AC Unit

Evaluating the advantages and disadvantages of repairing an AC unit can be a complex decision-making process. One of the main advantages of repairing an AC unit is the potential cost savings compared to replacement. If the issue is a minor one, such as a faulty capacitor or a dirty air filter, the repair costs can be relatively low. Additionally, repairing the AC unit can extend its lifespan and delay the need for a replacement, providing additional savings in the long run.

On the other hand, there are several disadvantages to repairing an AC unit. If the unit is experiencing compressor issues, the cost of repair can be prohibitively expensive. Additionally, even with a repair, the AC unit may not perform as efficiently as a newer model, resulting in higher energy bills. The overall efficiency of an AC unit also declines as it ages, leading to additional costs for repairs and maintenance. Ultimately, the decision to repair or replace an AC unit should be based on a thorough evaluation of the unit’s age, efficiency, and potential repair costs.

Pros and Cons of Replacing an AC Unit

Moving on to the topic of air conditioner replacement, it is important to weigh the pros and cons of investing in a new unit. One major advantage of replacing an outdated AC system is the availability of newer technology that can provide better energy efficiency and improved indoor air quality. Newer models also often come with longer warranties and can offer a higher return on investment over time.

However, it is important to consider the cost of a new AC unit, which can be a significant investment. The size of the unit and the installation process can also impact the overall cost. Additionally, it is important to consider the life expectancy of the new unit and conduct regular maintenance to ensure it lasts as long as possible. Ultimately, the decision to repair or replace an AC unit should be based on a careful evaluation of the unit’s condition, the cost of repairs versus replacement, and the potential benefits of investing in a new system.

Tips for prolonging the life of your air conditioning system

To ensure the longevity of your HVAC system, implementing proper maintenance practices and making necessary upgrades can be beneficial. Regular maintenance, such as cleaning or replacing air filters, can improve the efficiency of your system and prevent issues from arising. It is recommended to schedule maintenance at least once a year, ideally before the start of the cooling season. Additionally, keeping the area around the outdoor unit clear of debris and ensuring proper airflow can also improve the performance and lifespan of your AC unit.

Upgrading your system to more energy-efficient models can also be a wise investment in the long run. High SEER-rated units can reduce energy consumption and lower utility bills. It is important to consider the age and condition of your current system, as well as the cost of repairs, when deciding to repair or replace. However, investing in regular maintenance and upgrades can help prolong the life of your air conditioning system and save you money in the long run.

Conclusion

In conclusion, the decision to repair or replace your air conditioner hinges on various factors such as the age of your unit, the extent of damage, and the cost of repairs versus the cost of a new unit. It’s crucial to weigh the long-term benefits and costs of both options. While repairing your AC unit might seem cost-effective in the short term, it could lead to higher costs down the line if the unit continues to malfunction. Conversely, replacing your AC unit might seem like a hefty investment upfront, but it can result in long-term energy savings and enhanced comfort.

To extend the lifespan of your air conditioning system, it’s essential to schedule regular maintenance, change air filters regularly, and ensure your home is properly insulated. Plus, advancements in HVAC technology have led to more energy-efficient units that can save you money on energy bills while providing superior comfort.

Ultimately, making an informed decision about whether to repair or replace your air conditioner requires careful consideration of all available options and expert advice from HVAC professionals. That’s where Dallas Heating and Air Conditioning comes in. Our team of experienced professionals can provide you with the guidance you need to make the best decision for your home and budget.

Don’t leave your comfort to chance. Contact Dallas Heating and Air Conditioning today for a consultation. We’re here to ensure your home stays comfortable all year round.
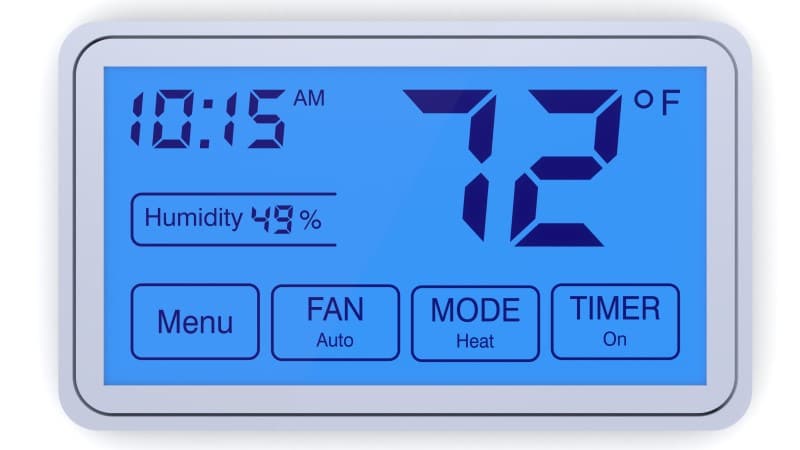
Smart Thermostats Vs Regular And Programmable Thermostats

As the Texas summer gets into full swing, many homeowners adjust their thermostats to ensure a comfortable indoor temperature. While traditional thermostats have served us well in the past, the rise of smart technology has introduced an entirely new way of managing our heating and cooling systems.

Smart thermostats are becoming increasingly popular, thanks to their ability to offer energy savings, convenience, and advanced features. As we compare smart thermostats with regular and programmable thermostats, it is important to understand the differences between the three types.

While regular thermostats are simple and straightforward, programmable thermostats have the advantage of being able to adjust temperature settings at different times of the day. Smart thermostats, on the other hand, take things a step further by allowing homeowners to control their heating and cooling systems from their smartphones, adjust temperature settings based on their location, and even learn their preferences over time.

In this article, we will explore the benefits and limitations of each type of thermostat, and help homeowners decide which option is best for their specific needs.

Key Takeaways

  • Smart thermostats are designed to manage climate-control systems in a way that traditional and programmable thermostats can’t, making them a worthwhile upgrade for many heating and cooling systems.
  • Smart thermostats can help most users save money on utility bills, with an average of 8% savings, and offer features like motion sensors and geo-fencing that help save energy.
  • Smart thermostats are easier to use than regular programmable thermostats, especially those with app-based interfaces, and have learning algorithms that try to automatically set a heating and cooling schedule based on user habits.
  • While smart thermostats may not save as much money in temperate climates with lower energy bills, they can still trim costs by about 8% on average and may be worth the investment in places with hot summers and frigid winters and high energy costs.

What a Thermostat Does

Understanding what a thermostat does is crucial to fully grasping the benefits of smart thermostats, which are designed to manage climate-control systems in a way that traditional and programmable thermostats cannot.

  • Regular thermostats are basic temperature controls that allow users to adjust the temperature manually.
  • Programmable thermostats allow users to set temperature schedules in advance, but they require manual input and do not adapt to user behavior.
  • Smart thermostats utilize advanced technology to learn user preferences, adjust settings automatically, and maximize energy efficiency.

Smart thermostats offer a wide range of features that set them apart from traditional and programmable thermostats.

  • Detect presence through sensors and geolocation, adjust temperature settings based on the user’s schedule, and provide remote control through smartphone apps or voice assistants.
  • Learning algorithms that anticipate user preferences and automatically adjust temperature settings accordingly.
  • Analyze energy usage and suggest ways to save money on heating and cooling costs.

Energy efficiency is a key advantage of smart thermostats.

By automatically adjusting temperature settings based on user behavior and preferences, they can save energy and reduce utility bills.

Regular and programmable thermostats, on the other hand, require manual input and do not adapt to user behavior, which can result in wasted energy and higher costs.

Overall, smart thermostats offer a more efficient and convenient way to manage climate-control systems, making them a worthwhile investment for many homeowners.

Types of Thermostats

This section will discuss the different types of thermostats available:

  • Standard thermostats: the simplest and most basic type, providing basic temperature control.
  • Programmable thermostats: allow for scheduled temperature changes.
  • Smart thermostats: offer advanced features such as learning algorithms, remote control through apps, and integration with other smart home devices.

Each type has its own advantages and limitations. Understanding the differences between them can help homeowners make informed decisions about which type of thermostat is best suited for their needs.

Standard

The traditional, non-programmable thermostats lack the advanced features and learning algorithms of smart thermostats, resulting in higher energy bills and a less efficient use of resources. They require constant adjustment to maintain a comfortable temperature, leading to unnecessary AC power usage and increased costs. Additionally, manual thermostats do not have the ability to learn the household’s schedule and preferences, resulting in a less personalized and less efficient use of energy.

Programmable

programmable hvac thermostat

Programmable thermostats allow users to set a heating and cooling schedule, reducing energy usage and costs compared to manual thermostats. However, they lack the advanced features of smart thermostats, such as learning algorithms and remote control capabilities. They require manual thermostat programming to set a schedule, which can be tedious and time-consuming. Additionally, they do not have the ability to learn user habits and adjust the temperature accordingly.

While programmable thermostats are a step up from regular thermostats, they do not offer the same level of energy savings and convenience as smart thermostats.

Smart

Adoption of green technology like smart thermostats is changing the energy industry, with some models equipped with built-in AI that can knock as much as 30% off heating and cooling bills. Smart thermostats are designed to manage climate-control systems in a way that traditional thermostats cannot.

  • They learn a household’s schedule and anticipate preferred temperature settings, detect presence through sensors and geolocation, and allow adjustments through app or voice assistant. The best models perform setbacks to save energy by turning down heat or reducing AC when not in use. They calculate how long it takes to heat and cool a home for scheduling.
  • Compared to regular and programmable thermostats, smart thermostats save energy by turning off the heat and AC more often, without sacrificing comfort. They have common features like motion sensors and geo-fencing that help save energy.
  • They are easier to use than regular programmable thermostats, especially those with app-based interfaces.
  • Learning algorithms try to automatically set a heating and cooling schedule based on user habits.
  • Smart thermostats remind users to replace their HVAC filter.
  • Some smart thermostats connect to programs that allow utility companies to adjust thermostat settings in exchange for incentives.
  • They can save energy while maintaining or improving comfort in the home.
  • Some of the more popular brands of smart thermostats include: Nest (Google), ecobee, Honeywell, Emerson, Levoit, Cielo, Bosch and Sensi.

Even the most advanced smart thermostat can’t compensate for a malfunctioning AC unit. If you’re noticing performance issues with your AC even after optimizing your thermostat settings, it might be time for an AC repair. Visit our AC repair page to learn more about common issues and how Dallas Heating and Air Conditioning can help keep your home comfortable and energy-efficient.

Benefits and Limitations of Each Type

Smart thermostats, while offering convenience and potential energy savings, may not be as effective for homes with radiant heating systems compared to homes with central HVAC systems. Radiant systems primarily heat up people and objects, and smart thermostats may not be as efficient in regulating temperatures. However, some smart thermostats can still find ways to save energy with radiant systems by adjusting temperature settings based on occupancy and usage patterns.

It’s important to consider the limitations of each type. Regular thermostats have no programming options and may not save as much energy compared to programmable or smart thermostats. Programmable thermostats allow for more precise temperature control and scheduling, but may still require manual adjustments and can be difficult to program. Smart thermostats offer the most features, such as learning algorithms, remote access, and integration with other smart home devices, but can be more expensive and may not be compatible with all HVAC systems.

Overall, the choice of thermostat depends on the specific needs and preferences of each homeowner. It is important to consider factors such as home energy use, HVAC system compatibility, and budget when deciding which type of thermostat to install.

Smart thermostats, with their built-in AI and advanced features, can provide the most potential energy savings and convenience, but may not be necessary or cost-effective for every home.

Cost and Energy Efficiency Analysis

The cost of upgrading a home’s thermostat and its impact on energy efficiency is an important consideration for homeowners. Smart thermostats are more expensive than regular and programmable thermostats, with prices ranging from $100 to $500. However, they offer features like learning algorithms, remote temperature sensors, and integration with other smart home devices that can help save energy and lower utility bills.

According to a study “Energy Efficiency Effectiveness of Smart Thermostat Based BEMS”, the researchers have scientifically proven that a smart temperature control system will save home and business owners money in the long run.

According to data from two separate studies conducted on real-life Nest users, the use of smart thermostats can lead to an average savings of 10-12% on heating costs and about 15% on cooling expenses. Nest itself estimates that these savings could translate to around $140 a year off your energy bills, based on typical energy cost structures. However, it’s worth noting that these figures aren’t set in stone. Savings can vary depending on a number of factors such as the size of your home and your specific energy use habits.

Looking at another smart thermostat brand, ecobee, they conducted an internal customer analysis back in 2013. Their customers experienced up to a 23% decrease in heating and cooling costs, which might put an extra $200 back into their pockets each year.

In addition to the initial cost of the thermostat upgrade, there may also be installation costs and extra tools or materials required. However, some states, local city governments, and energy providers offer rebates and discounts for smart thermostat purchases.

While the investment in a smart thermostat may not make sense for all homeowners, those living in places with hot summers and frigid winters and high energy costs may find it to be worth the cost for the potential energy savings and convenience.

Factors to consider when choosing a thermostat

Choosing the right thermostat can have a significant impact on a homeowner’s energy usage and utility bills. There are several factors to consider when choosing a thermostat, such as the type of HVAC system in the home, the homeowner’s schedule, and the desired level of control and automation.

One option for homeowners looking to upgrade their thermostat is AI thermostats, which use machine learning algorithms to learn a homeowner’s schedule and preferences and adjust temperature settings accordingly.

However, it’s important to keep in mind that not all AI thermostats are created equal, and some may have limitations depending on the type of HVAC system in the home. For example, some thermostats may not work with certain HVAC systems or require additional equipment, such as C-wire adapters, to function properly.

It’s also important to consider the cost of installing a wifi thermostat, which can range from $100 to $500, plus installation costs and extra tools or materials.

When choosing a thermostat, homeowners should weigh the benefits of upgrading to a smart or AI thermostat against the potential cost and limitations. While a thermostat upgrade can provide greater control and automation, it may not be necessary or cost-effective for all homeowners.

Ultimately, the decision to upgrade to an AI thermostat should be based on a homeowner’s individual needs and preferences, as well as the compatibility of the thermostat with their HVAC system.

Frequently Asked Questions

Can smart thermostats be controlled manually, or do they rely solely on learning algorithms?

Smart thermostats can be controlled manually through the app or voice assistant, and they also rely on learning algorithms to set heating and cooling schedules based on user habits. They offer convenience and energy savings, especially for homes with central air conditioning and furnace-based heating systems.

Are there any potential downsides to using a smart thermostat?

Like any technology, smart thermostats have potential downsides. They may not be compatible with certain HVAC systems, and may not save as much money in temperate climates. However, for homes with central air and furnace-based heating systems, the benefits of saving energy and improving comfort may be worth the investment.

How long does it typically take to recoup the cost of a smart thermostat through energy savings?

The typical timeframe for recouping the cost of a smart thermostat through energy savings varies depending on factors such as energy costs and usage patterns, but it can be as little as one to two years and up to five years or more.

Can smart thermostats be integrated with other smart home devices, such as smart light bulbs or door locks?

Most smart thermostats can be integrated with other smart home devices, providing a convenient and cohesive home automation system. So you can consolidate all your smart devices into a single app and have those devices interact with one another.

Are there any state or federal incentives available for purchasing and installing a smart thermostat?

There are several state and federal incentives available for purchasing and installing a smart thermostat, including rebates and discounts from energy providers, states, and local city governments. These incentives can help offset the cost of the investment and promote the adoption of green technology. In North Texas, Atmos Energy’s website lists rebates for smart thermostats, as does Oncor’s website.

Are smart thermostats tax deductible?

No. There are no energy tax credits for installing a smart thermostat.

Conclusion

Upgrading to a smart thermostat can bring a significant improvement to your home’s comfort level and energy efficiency. With potential savings on heating and cooling costs, it’s an investment that not only pays for itself over time but also contributes to a more sustainable future. However, the transition to a smart thermostat should be handled with professional expertise to ensure it’s set up and functioning correctly for optimal performance.

Here at Dallas Heating and Air Conditioning, we specialize in smart thermostat installation and maintenance, providing you with peace of mind and maximum comfort. Don’t wait to start saving on your energy bills and enhancing your home’s comfort. Give Dallas Heating and Air Conditioning a call today to schedule a consultation or service appointment. Let us help you make the smart choice for your home’s heating and cooling system.

What’s The Best Temperature Setting For Your AC?

Finding the perfect temperature setting for your air conditioner (AC) is more than just a matter of comfort—it’s a balance between personal preferences, energy efficiency, and environmental factors. While the Department of Energy suggests a standard setting of 78°F for energy efficiency, the optimal temperature for your home can vary based on a range of factors. This detailed guide, provided by Dallas Heating and Air Conditioning, will explore these factors, debunk common myths, and offer practical advice on optimizing your AC settings.

Understanding the Ideal Temperature Setting

The ideal temperature setting for your AC isn’t one-size-fits-all. Various factors influence what might be the best temperature for your specific needs. Here’s an in-depth look at the factors that play a role in determining the right setting for your home.

Local Climate

Dallas, TX, is known for its hot and humid summers. The external climate significantly impacts your indoor comfort and cooling efficiency. On extremely hot days, setting your AC to 78°F might feel warmer than it does during milder weather. It’s essential to adjust your thermostat settings based on the outdoor temperature to maintain a comfortable indoor environment without overworking your AC unit.

House Size and Insulation

The size of your home and the quality of its insulation affect how well your AC system maintains the desired temperature. Larger homes or those with poor insulation may need to have the thermostat set to a lower temperature to achieve the same comfort level as smaller or well-insulated homes. Proper insulation helps retain cool air and can reduce the strain on your AC system, allowing for a higher thermostat setting while still maintaining comfort.

Number of Occupants

The number of people living in your home influences how much heat is generated inside. More occupants produce more body heat, which can make a room feel warmer. If your home is frequently occupied, you might need to set your AC to a lower temperature to compensate for the additional heat. Conversely, when fewer people are home, you might be able to raise the temperature without sacrificing comfort.

Personal Comfort Preferences

Personal comfort preferences vary widely. Some people may prefer a cooler environment, while others are comfortable with a warmer setting. It’s important to find a temperature that satisfies all household members’ comfort needs. This might involve setting different temperatures in various parts of the home if you have a zoning system or using personal fans to achieve the right level of comfort.

Time of Day

Temperature needs can change throughout the day. At night, when outdoor temperatures drop, you might not need to keep your AC as cool as during the day. Many people find that cooler temperatures are beneficial for sleeping, typically between 65°F and 70°F. This helps lower your body’s core temperature, promoting better sleep quality. Adjusting your thermostat based on time of day can help balance comfort and energy efficiency.

Home Occupancy

When your home is empty, it’s an excellent opportunity to save energy by raising the thermostat temperature. The U.S. Department of Energy recommends increasing the temperature by 7-10°F when you are away from home or asleep. This adjustment can lead to significant energy savings without compromising comfort when you return home.

Health Conditions

Certain health conditions may necessitate a specific indoor temperature. For example, individuals with respiratory issues or other medical conditions might need a cooler environment to breathe comfortably. Conversely, elderly individuals and infants might require warmer temperatures. Adjusting the thermostat to accommodate these needs ensures a comfortable and health-conscious living environment.

Age of AC Unit

The age and type of your AC unit can influence its efficiency and the optimal temperature setting. Older units might not be as effective at cooling, meaning you might need to set the temperature lower to achieve the desired comfort level. Newer, more efficient units can maintain comfort more easily and may allow for a higher thermostat setting without compromising performance.

The 20-Degree Rule

A useful guideline for optimal AC performance is not to set your thermostat more than 20 degrees lower than the outside temperature. This rule helps avoid overworking the system and maintains efficiency. For example, if it’s 90°F outside, setting your AC below 70°F might be inefficient and lead to increased energy consumption.

Humidity Control

Humidity levels play a crucial role in how temperature is perceived. High humidity can make a room feel warmer, while low humidity can make it feel cooler. During hot and humid months, it might be necessary to set your AC to a lower temperature to control humidity levels effectively and maintain a comfortable indoor environment.

Balancing Energy Efficiency and Comfort

Finding the right balance between energy efficiency and comfort involves understanding how temperature settings impact both your comfort and utility bills. Here’s how you can optimize your AC settings while keeping energy costs in check:

Understanding Energy Efficiency

A common misconception is that setting your AC to a very low temperature will cool your home faster. In reality, the AC system works at the same rate to reach the set temperature, regardless of how low it is set. Lowering the temperature setting increases energy consumption and can lead to higher utility bills.

The Department of Energy recommends setting the thermostat to 78°F during the day when you are home. When you are away or sleeping, raising the temperature by 7-10°F can help reduce energy consumption. This strategy allows for comfortable living while also saving on cooling costs.

Using Programmable and Smart Thermostats

Programmable and smart thermostats can significantly enhance your ability to manage indoor temperature efficiently. These devices allow you to set specific temperature schedules based on your daily routines. For example, you can program the thermostat to lower the temperature before you come home and raise it when you leave.

Smart thermostats offer additional features such as remote access and automation. They can learn your preferences and adjust settings accordingly, providing a balance between comfort and energy savings. Investing in a smart thermostat can help optimize your cooling system’s performance and potentially reduce the need for repairs.

Optimal Temperature Settings for Various Scenarios

Sleeping

For a restful night’s sleep, it is generally recommended to set the thermostat between 65°F and 70°F. This cooler temperature range helps lower your body’s core temperature, improving sleep quality. However, infants and small children may need slightly warmer temperatures for better sleep. Adjusting the temperature to suit your family’s needs is crucial for a good night’s rest.

When Away from Home

When you’re not home, raising the thermostat temperature can lead to significant energy savings. The U.S. Department of Energy suggests increasing the temperature by 7-10°F during periods of absence. This adjustment helps reduce energy consumption while ensuring your home remains comfortable when you return.

Daily Living

During the day, finding a comfortable yet energy-efficient setting is key. For many households, 78°F is a good starting point. However, you may need to adjust this based on factors such as activity levels, external temperature, and personal preferences. Regular experimentation with different settings can help you determine the best temperature for daily living.

Addressing Common Misconceptions About AC Temperature Settings

Understanding and correcting common misconceptions about AC temperature settings can help you make more informed decisions and improve comfort and energy efficiency:

Lower Temperatures Cool Faster

It is a common myth that setting the thermostat lower will cool your home faster. In reality, the AC system will only work to reach the set temperature, regardless of how low it is set. Lowering the temperature setting does not speed up the cooling process but increases energy consumption.

Every Degree Lower Saves Energy

Each degree you lower the temperature increases energy consumption. Conversely, raising the thermostat by a degree can result in energy savings. For example, you can save up to 1-3% on cooling expenses for each degree you raise the thermostat. Striking a balance between energy efficiency and comfort is essential.

One-Size-Fits-All Solutions

The ideal temperature setting is not universal and can vary based on climate, insulation, and personal comfort preferences. It’s important to experiment with different settings to find what works best for your home and lifestyle.

Energy-Efficient AC Systems and Comfort

High-efficiency AC systems can reduce energy costs but may not always provide the most comfortable indoor temperature in extremely hot climates or poorly insulated homes. It’s important to balance efficiency with comfort based on your specific needs and home conditions.

Tips to Enhance Comfort and Efficiency Beyond AC Settings

While setting the thermostat is crucial for comfort and efficiency, other factors can further improve your indoor environment and reduce energy costs:

Zoning Systems

Zoning systems allow you to control temperatures in different areas of your home independently. This customization can enhance comfort and reduce energy costs by cooling only the rooms that are in use.

Window Treatments

Using window coverings to block out sunlight and heat can reduce the need for constant AC usage. Window treatments such as shades, blinds, or curtains can help maintain a comfortable indoor temperature more efficiently.

Indoor Air Quality

Maintaining good indoor air quality is essential for comfort and health. Regular air filter replacement and cleaning can improve AC efficiency and reduce the buildup of pollutants in the air. Investing in high-quality filters can also enhance the overall air quality in your home.

Energy-Efficient AC Systems

Investing in energy-efficient AC systems can provide long-term savings on energy bills while ensuring comfortable indoor temperatures. Proper sizing and maintenance of your system are key to achieving these benefits. Regular servicing and upgrades to energy-efficient models can improve performance and efficiency.

Determining the best temperature setting for your AC involves balancing personal comfort with energy efficiency. While the Department of Energy recommends 78°F as a standard setting, various factors such as climate, home size, and personal preferences play a crucial role in finding the ideal temperature for your home.

Using smart and programmable thermostats, understanding common misconceptions, and considering additional comfort factors can help you achieve a balance that ensures both comfort and cost savings. Regular maintenance and investment in energy-efficient systems can further enhance your home’s indoor environment and reduce energy consumption.

If you encounter issues with your AC system or need assistance optimizing your temperature settings, Dallas Heating and Air Conditioning is here to help. Our experienced team is ready to provide expert advice, regular servicing, and emergency repairs to ensure your home remains a comfortable haven throughout the year. Contact us today to ensure your AC system is running efficiently and effectively, providing you with the comfort and savings you deserve.

How to Keep Your AC Running Smoothly Throughout the Year

Air conditioning systems are indispensable in maintaining comfort within our homes, particularly in the intense heat of Dallas summers. They play a critical role not only in cooling the air but also in controlling humidity levels, which contributes to a pleasant living environment. To ensure your AC unit operates efficiently and avoids unexpected breakdowns, it’s essential to follow a structured maintenance routine. In this comprehensive guide, we’ll walk you through the key steps to keep your air conditioning system running smoothly all year long.

Understanding the Components of Your AC System

Air conditioning systems are complex machines with several integral components working together to deliver cool, comfortable air. Understanding these components can help you appreciate why regular maintenance is vital.

1. Compressor

The compressor is often described as the heart of the AC system. Its primary function is to compress refrigerant gas and circulate it through the system. This process increases the refrigerant’s pressure and temperature, preparing it for heat release in the condenser coils. Without a well-functioning compressor, the cooling cycle cannot proceed effectively.

2. Condenser Coils

Located in the outdoor unit, the condenser coils are responsible for releasing heat absorbed from the indoor air. As the refrigerant flows through these coils, it cools and releases heat to the outside air. Dirty or obstructed condenser coils can significantly reduce system efficiency, causing the unit to work harder and increasing energy consumption.

3. Evaporator Coils

Situated inside the home, the evaporator coils absorb heat from the indoor air, cooling it before it is circulated back through the house. These coils also help dehumidify the air, which is crucial for comfort. Efficient operation of the evaporator coils is essential for maintaining a cool and pleasant indoor environment.

4. Expansion Valve

The expansion valve controls the flow of refrigerant into the evaporator coils. It regulates the temperature and pressure of the refrigerant, ensuring that it evaporates properly and absorbs the maximum amount of heat. Proper functioning of the expansion valve is crucial for maintaining optimal cooling performance.

Regularly Scheduled Inspections and Cleaning

Consistent maintenance is key to ensuring your AC system remains in top condition throughout the year. Here’s a detailed look at the essential maintenance tasks:

1. Cleaning or Replacing Air Filters

Air filters trap dust, pollen, and other particles from entering the system. Over time, these filters can become clogged, impeding airflow and reducing system efficiency. Here’s how to manage air filters:

  • Monthly Checks: Inspect filters every month. If they appear dirty or clogged, replace them immediately.
  • Types of Filters: Choose filters based on your home’s needs. Options include HEPA filters for high-efficiency particulate air and activated carbon filters for odor removal.
  • Professional Cleaning: Have a professional technician inspect and clean your entire system annually to ensure optimal performance.

2. Inspecting Refrigerant Levels

Refrigerant is crucial for cooling your home. Low refrigerant levels can cause the system to underperform or freeze up. Regular checks are necessary to maintain efficiency:

  • Professional Assessment: Only qualified technicians should check and adjust refrigerant levels. They use specialized gauges to measure pressure and ensure it meets manufacturer specifications.
  • Avoid DIY: Handling refrigerant requires specialized training and equipment. Incorrect handling can lead to unsafe conditions or system damage.

3. Cleaning Evaporator and Condenser Coils

Dirty coils can significantly impact system performance. Regular cleaning helps maintain efficiency:

  • Turn Off Power: Always shut off power before performing any maintenance.
  • Remove Debris: Clear away leaves, dirt, and other debris from around the condenser unit.
  • Brush and Vacuum: Use a soft brush to remove dirt from the coil fins. A vacuum with a hose attachment can help clean between the fins.
  • Inspect for Damage: Check for bent fins or other damage. Use a fin comb to straighten bent fins.

4. Checking Electrical Connections

Electrical connections are critical for safe and efficient operation. Regular checks help prevent potential hazards:

  • Inspect Connections: Look for loose or damaged wires and connections.
  • Tighten and Repair: Secure loose connections and replace any damaged wires.

5. Inspecting the Fan Belt

The fan belt helps drive the fan that circulates air through the system. Regular inspection ensures it operates correctly:

  • Check for Wear: Look for signs of wear or damage on the fan belt.
  • Adjust Tension: Ensure the belt is properly tensioned to avoid slipping or breakage.

Checking and Replacing Filters

Air filters are a small but crucial component of your AC system. They play a significant role in maintaining indoor air quality and system efficiency. Here’s a closer look at managing filters:

1. Frequency of Replacement

Filters should be checked at least once a month. Depending on usage and environmental conditions, you may need to replace them more frequently. Signs that a filter needs replacing include:

  • Reduced Airflow: If you notice a decrease in airflow, the filter may be clogged.
  • Increased Energy Bills: A dirty filter can cause the system to work harder, increasing energy costs.
  • Poor Air Quality: If indoor air quality worsens, it might be due to a clogged filter.

2. Types of Filters

Different filters offer various levels of filtration. Choose the one that best suits your needs:

  • HEPA Filters: These high-efficiency filters trap small particles and are ideal for homes with allergies or respiratory issues.
  • Activated Carbon Filters: Designed to remove odors and gases, these filters are beneficial if you have pets or smoke indoors.
  • Electrostatic Filters: These filters use static electricity to capture particles and are washable and reusable.

3. Professional Inspection

Once a year, schedule a professional inspection of your AC system. Technicians can assess the condition of the filters, clean the system, and ensure everything is functioning correctly.

Refrigerant Level Check-Up

Proper refrigerant levels are essential for effective cooling. Here’s what you need to know:

1. Importance of Proper Levels

Adequate refrigerant levels ensure that your system cools efficiently. Low levels can cause the system to work harder, leading to higher energy bills and potential damage.

2. How Professionals Check Levels

Technicians use specialized gauges to measure refrigerant pressure. They compare these readings to the manufacturer’s specifications and adjust levels as needed.

3. Addressing Refrigerant Leaks

If refrigerant levels are low, there may be a leak. Technicians will locate and repair any leaks before recharging the system. This ensures that the system operates efficiently and safely.

Condenser Coil Cleaning

The condenser coils release heat absorbed by the refrigerant. Keeping them clean is vital for maintaining system efficiency:

1. Turn Off the Power

Always turn off power to the AC unit before starting any maintenance work. This ensures your safety while performing the cleaning.

2. Remove Debris

Clear away any debris around the condenser unit. This includes leaves, sticks, and other obstructions that can impede airflow.

3. Clean the Coils

Use a soft brush to gently scrub the coil fins. For more thorough cleaning, use a vacuum with a hose attachment to remove dust and dirt between the fins.

4. Check for Damage

Inspect the coils for any signs of damage, such as bent fins or corrosion. Use a fin comb to straighten bent fins and ensure proper airflow.

Inspecting Ductwork for Leaks

Ductwork leaks can significantly impact your system’s efficiency. Proper inspection and repair are crucial:

1. Visual Inspection

Examine duct joints and seams for any visible gaps or holes. Leaks can lead to air loss and reduced system efficiency.

2. Pressure Testing

A pressure test with a manometer can help identify leaks by measuring pressure loss in the duct system. This test helps locate leaks that may not be visible.

3. Seal Leaks

Use duct tape or mastic sealant to seal any detected leaks. Ensure that all joints are properly sealed to prevent air from escaping.

4. Check Insulation

Inspect the insulation around the ducts for any damage or tears. Replace or repair insulation as needed to maintain energy efficiency.

Professional Maintenance Services

Investing in professional maintenance services can provide numerous benefits:

1. Comprehensive Inspection

Professional technicians will perform a thorough inspection of your entire AC system, including filters, coils, electrical connections, and refrigerant levels. They can identify and address issues before they become major problems.

2. Cleaning and Adjustments

Technicians will clean essential components, adjust settings, and make necessary repairs. Regular professional maintenance helps keep your system running efficiently and prolongs its lifespan.

3. Safety Checks

Professionals are trained to recognize potential safety hazards, such as faulty wiring or gas leaks. Their inspections help ensure your home remains safe from potential risks associated with air conditioning systems.

4. Extended Warranty

Many HVAC companies offer extended warranties or maintenance plans that include regular inspections and priority service. These plans can provide peace of mind and save money on future repairs.

5. Expert Advice

Technicians can provide valuable advice on improving system efficiency, reducing energy costs, and addressing specific concerns. They can also recommend upgrades or modifications to enhance performance.

Maintaining your air conditioning system is essential for ensuring its efficiency, reliability, and longevity. By understanding the components of your AC system, scheduling regular inspections and cleanings, and addressing issues such as filter replacement, refrigerant levels, and coil cleanliness, you can keep your system running smoothly throughout the year.

Regular maintenance not only helps prevent unexpected breakdowns and costly repairs but also improves energy efficiency and indoor comfort. If you’re not comfortable performing these tasks yourself, don’t hesitate to reach out to a professional HVAC company.

For reliable maintenance and repair services in the Dallas area, Dallas Heating and Air Conditioning is here to help. Our team of experts is dedicated to ensuring your AC system operates at its best, no matter the season. Contact us today to schedule your next service appointment and experience the peace of mind that comes with knowing your cooling system is in expert hands.

Your comfort is our priority, and we’re committed to providing exceptional service to keep your home cool and comfortable all year long.

Diagnosing A Bad Blower Motor

When it comes to diagnosing your home’s air conditioning problems, it’s a case of “one step forward, two steps back”. Blower motors are no exception and can be tricky to pinpoint the source of an issue. This article will provide a comprehensive guide on how to diagnose a bad blower motor and assess if it needs to be replaced or repaired.

The blower motor is responsible for distributing air throughout your home. If you notice your vents not producing enough air or coming out at an unusual temperature, then the blower motor may be faulty. There are two main types of blower motors used in HVAC systems: PSC (Permanent Split Capacitor) motors and ECM (Electronically Commutated Motor) motors. PSC motors are older and more common in many systems. They use a capacitor to help start and run the motor efficiently. These motors are less expensive but also less energy-efficient than their ECM counterparts. On the other hand, ECM motors are newer and more advanced. They use a built-in microprocessor to control the motor’s speed and operation, making them significantly more energy-efficient than PSC motors. ECM motors also tend to run more quietly and offer better performance overall, but they come at a higher cost. When choosing between the two types of motors, it’s essential to consider factors such as energy efficiency, cost, and system compatibility.

This guide will provide step-by-step instructions for diagnosing a bad blower motor, taking into account both PSC and ECM types. Keep in mind that working with HVAC systems can be dangerous if you don’t know what you’re doing. Always follow safety precautions and consult a professional if you’re unsure about any aspect of the process. Read on as we explain in detail exactly what needs to be done when diagnosing a bad blower motor.

Understanding The Sequence Of Operation

Understanding the sequence of operation of a blower motor is essential to diagnosing any problems that may arise. The sequence of operation is a series of events that take place in a specific order for an HVAC system to function correctly. In the case of a furnace with a blower motor, the sequence begins with a thermostat call for heating or cooling.

In HVAC systems, letter terminals refer to specific connections on the thermostat and the control board that are responsible for different functions. Each letter represents a particular function or component in the system. For cooling mode, the thermostat connects 24 volts from the R (power) terminal to the Y (cooling) and G (fan) terminals. The Y terminal energizes the outdoor unit, while the G terminal energizes the air handler’s blower motor.

For heating mode, the thermostat connects the 24 volts from the R (power) terminal only to the W (heating) terminal, which initiates a series of events for the furnace to start up. Unlike in cooling mode, the G (fan) terminal is not energized, as the control board is responsible for signaling the blower motor when to turn on. This typically occurs 30 to 60 seconds after the flame has ignited, allowing the heat exchanger to warm up before the blower motor circulates warm air through the ducts.

The first step is to understand how the blower motor works. . Once you understand how the motor works, you can then begin to diagnose any potential issues with it.

Safety Precautions

It is estimated that over 200,000 house fires are caused by electrical problems each year. Before attempting to diagnose a bad blower motor it is important to take safety precautions.

Always disconnect power from the furnace before opening the panel and inspecting the motor. Make sure the power is off for at least one minute before touching any of the components in order to ensure all capacitors inside have discharged. Wear gloves, goggles, and other protective gear when working with electricity and always make sure you are properly grounded.

Taking these simple steps can help protect against harm while diagnosing a bad blower motor. Moving on to visual inspection, this may be necessary to determine if the problem lies with the motor itself or another component of the system.

Visual Inspection

The first step in diagnosing a bad blower motor is to visually inspect it. Look for any obvious signs of damage, like cracking or fraying in the insulation of the wires and terminals. Check for worn or burned out components, as well as any corrosion.

Here are some other key points to consider:

  1. Make sure the motor is properly mounted and secure.
  2. Examine the original wiring diagram to ensure all connections are correct and secure.
  3. Visually inspect the capacitor for any physical damage or discoloration that might indicate an issue with it not functioning properly.

Once you’ve completed your visual inspection of the blower motor, it’s time to move on to checking the power supply.

Checking Power Supply

It’s estimated that nearly 20% of HVAC blower motor repairs are caused by a lack of power supply. To diagnose a bad blower motor, it’s important to check the power supply first. A multimeter can be used to measure the voltage and current at the motor terminals. If the voltage is too high or too low, then this indicates an issue in the power supply and not with the motor itself.

The next step is to verify capacitor functionality. To do this, a capacitor tester should be used to test for capacitance and continuity. If either of these tests fail, then it’s likely that there is an issue with the capacitor which needs to be replaced. This could be causing reduced performance or complete failure of the blower motor. Moving onto verifying capacitor functionality will help determine if this is indeed an issue with your system.

Verifying Capacitor Functionality

The capacitor is responsible for helping the blower motor to start. To verify that it’s working correctly, use a multi-meter to measure its capacitance. Start by unplugging the power, then disconnect the capacitor wires from the blower motor. Set your multimeter to measure capacitance, then attach the leads of the meter to each of the capacitor terminals. You should get a reading that reflects the capacitance stated on its label. If not, it’s likely that the capacitor has failed and needs to be replaced. To be sure, test continuity across all three terminals with an ohmmeter—if there’s no continuity, replace it. If all tests come back normal, reconnect the capacitor to the blower motor and plug in power to continue diagnosing other components of your system. Read more about detailed capacitor troubleshooting.

Moving on, assessing motor temperature is an important factor for proper diagnosis.

Comparing Amp Draws

Having identified the motor’s temperature, the next step is to compare amp draws. This can be done with a multimeter, or by using an amp clamp on the lead wires. Comparing the motor’s amps against its rated amps will help you determine if there is an issue with the blower motor that needs to be addressed.

Here are three tips for comparing amp draws:

  1. Make sure that both your multimeter and amp clamp are set to AC voltage before connecting them to any wires.
  2. Measure the current draw of the motor at full load and compare it to its rated amps.
  3. If necessary, use a VOM to measure voltage drop across the control circuit and power circuit of the motor.

Now that we’ve compared amp draws, we need to inspect for signs of a bad blower motor by inspecting its spin. To do this, we’ll want to make sure that all connections are secure and tight and then check for proper rotation direction when turning on the power supply.

Inspecting Motor Spin

In order to diagnose a bad blower motor, the first step is to inspect the motor spin. To do this, turn off the power and disconnect the electrical harness. Then, remove any screws or bolts that are holding it in place. Once removed, the motor should be able to be manually spun by hand. It should spin freely and smoothly, with no grinding or jerking. If there is any obstruction preventing it from spinning properly, you will need to investigate further to identify its cause.

If the motor spins correctly, move on to identifying any unusual noises coming from it. These could provide clues as to what kind of issue you are dealing with and what steps you may need to take next. For instance, a humming noise could indicate a faulty capacitor or winding issue that needs to be addressed. Transitioning into identifying these noises can help further your diagnosis of a bad blower motor.

Identifying Unusual Noises

Now that we have inspected the motor spin, it’s time to identify any unusual noises. According to the National Fire Protection Association, approximately 5% of all home fires in the United States are caused by malfunctioning heating systems. This emphasizes how important it is to properly diagnose a bad blower motor.

In order to identify any strange noises from a failing blower motor, start by listening for loud and persistent rattling or grinding sounds. These could be signs of worn bearings or an unbalanced fan wheel. Also listen for screeching or squealing noises which could indicate worn drive belts or low lubrication levels in the motor shafts. Any of these issues could lead to a failed blower motor and should be addressed as soon as possible.

The next step is to inspect the blower wheel for signs of damage or wear that may be causing the issue.

Inspecting The Blower Wheel

The first step to diagnosing a bad blower motor is inspecting the blower wheel. This is the fan-like device that circulates air from the furnace and into your duct system. To do this, locate the access panel of the furnace and remove it. Once you have access, check for any blockages in the wheel or any visible damage like cracks or missing pieces. If you notice anything blocking or obstructing the wheel, clean it off and check again.

It’s also important to make sure that there is no debris around it that could be causing issues with air flow. Make sure all filters are clear of dust and dirt to ensure proper operation of the blower motor. Check for loose screws, bent blades, or other signs of damage as well. If any of these problems are present, then you may need to replace the entire blower motor assembly rather than just one part.

Importance Of Clean Filters

The importance of clean filters cannot be overstated when diagnosing a bad blower motor. Clogged filters can cause the blower to overheat, which can damage the motor and even cause it to fail. It’s easy to check the air filter, simply remove it and hold it up to a light. If you can see through it easily, your filter is clean and in good shape. If not, it needs to be replaced or cleaned with a vacuum cleaner or compressed air. Additionally, check for any dust or debris that has collected on the fan blades or other parts of the motor; if present, this should also be removed for proper operation.

Regularly cleaning or replacing your air filter is an important part of maintaining your blower motor. This simple task can help keep your unit running smoothly and efficiently for years to come. To ensure optimal performance, this necessary step should never be neglected. Moving on from here, checking motor bearings is another crucial component in diagnosing a bad blower motor.

Checking Motor Bearings

An ominous humming noise, like the sound of a distant airplane, can be heard when the blower motor is turned on. To diagnose the bad motor, we must check its bearings. It’s time to put on our detective hats and investigate further.

InvestigationResult
Feel for heatNo heat detected in the motor housing or shaft
Listen for noiseHumming sound increased when pressure applied to bearing area
Check voltage at terminalsVoltage present; no signs of electrical interference
Spin shaft manually with fingersShaft turns smoothly but with slight resistance from bearing area
Checking Motor Bearings

The investigation revealed that the bearings are likely worn out and need to be replaced. We have now diagnosed the cause of the bad blower motor: its bearings have failed. The next step is to determine if it is feasible to replace just these components, or if total motor replacement is necessary.

When To Consider Total Motor Replacement

When a blower motor is not working properly, it may be time to consider replacing the entire motor. Here are some indicators that point to total replacement:

  • Poor performance:
  • The motor is running slower than usual, or unable to achieve the desired speed
  • There is an unusual amount of vibration coming from the motor
  • Excessive noise:
  • Unusual humming or buzzing noises when the motor is turned on
  • High-pitched screeching noises during operation

Replacing the entire motor may be necessary if there are any signs of damage such as burning smells, smoke, sparks, or charred wiring. It’s also important to check for any loose parts or worn out pieces that need to be replaced. If neither repairs nor replacement of individual components can restore proper function, then total replacement should be considered.

Conclusion

In conclusion, diagnosing a bad blower motor can be a challenging task. It’s important to take the proper safety precautions and always inspect the power supply first before proceeding. Once you’ve analyzed the situation and checked the capacitor, blower wheel, and filters for signs of wear or damage, then it’s time to inspect the motor bearings. If they’re worn out, it may be time for total replacement.

By taking into account all of these factors and being mindful of any potential problems that could arise, you’ll be able to accurately diagnose a bad blower motor in no time. Through thorough inspection and careful consideration of all possible scenarios, you can achieve success when it comes to repairing or replacing this crucial piece of equipment.

At the end of the day, diagnosing a bad blower motor requires precision and patience. By paying close attention to details and using your powers of observation, you’ll be able to properly assess any issues with this important component quickly and effectively. With these tips in mind, you’ll have no problem dealing with a faulty blower motor!

AC Repairs – Troubleshooting Capacitors

[toc]

When your AC system stops working, one of the first things we check during the air conditioning troubleshooting process is the capacitor. A capacitor is like a small energy storage device that helps motors in an HVAC system work better. Imagine a capacitor as a little battery that can quickly store and release energy when needed. In an HVAC system, motors need a boost of power to start spinning, and capacitors help provide that extra energy.

There are 2 kinds of capacitors in air conditioner systems. One kind is for starting the motor, and it gives a quick burst of energy to help the motor start spinning. The other kind is for running the motor, and it helps the motor work more smoothly and efficiently while it’s running.

We need capacitors in HVAC systems because they help the motors, like the ones that power the fans (indoor blower fan and outdoor condenser unit) and the compressor (in the outside unit), work properly. By offering reliable power and performance, capacitors contribute significantly to the overall efficiency and functionality of HVAC systems. Without capacitors, these motors might have trouble starting or might not work as efficiently, making the HVAC system less effective at keeping our homes comfortable.

Types of Capacitors

Start Capacitors

These capacitors provide a temporary boost of power to help start the motor. They are only active for a short period during startup, then they are disconnected from the circuit. Start capacitors have higher capacitance values (typically in the range of 80-300 microfarads) and are designed to handle high starting torque requirements. These are commonly found in compressors and some high-torque blower motors.

Run Capacitors

These capacitors remain connected to the motor circuit during the entire operation. They help maintain a consistent voltage supply, improve motor efficiency, and increase torque during the motor’s running operation. Run capacitors have lower capacitance values (typically between 1-70 microfarads) and are designed for continuous duty. They are commonly found in both condenser fan motors and blower motors.

In some cases, HVAC systems may use a dual capacitor, which combines both start and run capacitors into a single unit. This design simplifies wiring and saves space. A dual capacitor usually has three terminals: one common (C), one for the fan motor (F), and one for the compressor or blower motor (H or M).

It’s important to note that capacitors used in HVAC systems are usually non-polarized electrolytic or polypropylene film capacitors, specifically designed for motor applications. They are rated for alternating current (AC) use and have a specific voltage rating and capacitance value.

Identifying Capacitor-Related Issues

Capacitor-related issues can cause various problems in your HVAC system, impacting its performance and efficiency. To effectively troubleshoot and repair these issues, it’s essential to recognize the symptoms of a failing capacitor, perform a visual inspection, and test the capacitor’s functionality. In this section, we’ll delve into these three aspects to help you diagnose capacitor-related issues confidently.

Common Symptoms of a Failing Capacitor

When a capacitor starts to fail, it can exhibit several noticeable symptoms that can help you pinpoint the problem. Some common symptoms include:

  • Difficulty starting: If the compressor or fan motor struggles to start or doesn’t start at all, a faulty start capacitor might be the culprit.
  • Intermittent operation: A failing run capacitor can cause motors to run intermittently or stop and start frequently.
  • Reduced efficiency: HVAC systems with failing capacitors may consume more energy and struggle to maintain the desired temperature.
  • Unusual noises: Humming or clicking sounds coming from the motors may indicate a problem with the capacitor.
  • Overheating: A failing capacitor can cause the motor to work harder and overheat, potentially leading to system shutdown or damage.

Visual Inspection: Bulging, Leaking, or Damaged Capacitors

A visual inspection can reveal physical signs of damage to a capacitor. Before inspecting the capacitor, always turn off the power to the HVAC system and follow safety precautions. Look for the following signs:

  • Bulging: A healthy capacitor should have a flat top. If the top is bulging or dome-shaped, it’s likely that the capacitor has failed.
  • Leaking: A leaking capacitor may have oily or corrosive substances around it, indicating that the internal electrolyte has leaked out and the capacitor is no longer functional.
  • Damage: Check for any visible cracks, ruptures, or burn marks on the capacitor’s casing, which may signify a failure.

Testing Capacitors: Multimeter and Capacitor Testers

If there are no visible signs of damage, you can use a multimeter or a dedicated capacitor tester to check the capacitor’s functionality. Before testing, ensure the capacitor is discharged safely to prevent electric shock.

  1. Using a multimeter: Set the multimeter to the capacitance setting (usually denoted by the symbol “µF” for microfarads). Place the probes on the capacitor’s terminals, and compare the reading with the capacitor’s rated capacitance. A significant deviation from the rated value indicates a faulty capacitor.
  2. Using a capacitor tester: These specialized testers are designed to test capacitors accurately. Connect the capacitor to the tester according to the manufacturer’s instructions, and observe the reading. A reading outside the acceptable tolerance range (usually ±5% to ±10% of the rated capacitance) suggests the capacitor is failing.

By understanding the symptoms of a failing capacitor, conducting a visual inspection, and testing the capacitor’s functionality, you can accurately identify capacitor-related issues in your HVAC system and proceed with the necessary repairs.

Safety Precautions for Troubleshooting Capacitors

When you’re working on capacitors, safety should always be a top priority. Follow these safety precautions to protect yourself and the equipment while troubleshooting capacitors.

Disconnecting Power to the HVAC System

Before attempting any troubleshooting or repairs, always disconnect power to the HVAC system – turn off the circuit breaker or disconnect switch that supplies power to the unit. Double-check that the power is off by using a non-contact voltage tester or a multimeter to ensure there is no live voltage present.

Discharging Capacitors Safely

Capacitors can store electrical energy even after the power is disconnected. To prevent electric shock, you must discharge the capacitor safely. Use an insulated screwdriver with a plastic handle, or a pair of insulated pliers. Place the metal end of the tool across the capacitor’s terminals, ensuring that you’re holding the insulated handle only. This will create a short circuit between the terminals, allowing the stored charge to dissipate safely.

Handling Capacitors: Protective Gear and Best Practices

It’s essential to follow best practices and use appropriate protective gear:

  • Wear safety glasses: This will protect your eyes from any potential sparks or debris that might be released during the troubleshooting or repair process.
  • Use insulated tools: Insulated tools protect you from accidental contact with live electrical components, reducing the risk of electric shock.
  • Avoid touching capacitor terminals with your bare hands: Even if you’ve discharged the capacitor, it’s best to avoid touching the terminals with your bare hands. Instead, handle capacitors by their casing or use insulated pliers or gloves.
  • Work in a well-lit area: Proper lighting ensures you can see what you’re doing, reducing the risk of mistakes or accidents.

By following these safety precautions, you can minimize the risks associated with troubleshooting and repairing capacitor-related issues in HVAC systems.

Diagnosing Capacitor Problems

To accurately diagnose capacitor problems in your HVAC system, you’ll need to evaluate the capacitor’s voltage and microfarad ratings, determine its tolerance deviation, and assess the performance of the connected motor. This section will guide you through these steps to help you identify and address capacitor-related issues effectively.

Evaluating Capacitor Voltage and Microfarad Ratings

Each capacitor has a specific voltage and microfarad (µF) rating, which is usually printed on it’s side. The voltage rating indicates the maximum voltage the capacitor can handle, while the microfarad rating represents the capacitance value. When diagnosing capacitor problems, ensure that the installed capacitor matches the specifications recommended by the manufacturer for the corresponding motor.

Determining Capacitor Tolerance Deviation

Capacitors have an acceptable tolerance range, typically ±5% to ±10% of the manufacturer’s rated capacitance. When testing a capacitor’s microfarad value using a multimeter or a capacitor tester, compare the measured value with the rated value. If the measured capacitance falls outside the specified tolerance range, the capacitor is likely faulty and needs to be replaced.

Assessing Motor Performance: Start and Run Capacitors

Capacitor problems can manifest differently, depending on whether the issue lies with the start or run capacitor. Here’s how to assess the motor performance for each capacitor type:

  • Start Capacitors: A faulty start capacitor may cause the motor to struggle during startup, produce a loud humming noise, or fail to start altogether. If you observe any of these symptoms, first verify the capacitor’s capacitance value and check for visible damage. If the capacitor appears to be the issue, replace it with one that matches the manufacturer’s specifications.
  • Run Capacitors: A failing run capacitor can cause the motor to overheat, run inefficiently, or cycle on and off frequently. To diagnose a run capacitor issue, monitor the motor’s temperature and performance. If you notice signs of overheating or inconsistent operation, test the capacitor’s capacitance value and inspect it for visible damage. Replace a faulty run capacitor with one that meets the manufacturer’s specifications.

By evaluating the capacitor’s voltage and microfarad ratings, determining tolerance deviation, and assessing motor performance, you can accurately diagnose capacitor problems and take the necessary steps to resolve them.

Replacing a Faulty Capacitor

If you found a capacitor issue, the next step is to replace the faulty capacitor with a new one. This section will guide you through the process of safely removing the old capacitor and installing a new one that matches the manufacturer’s specifications.

Preparing for Capacitor Replacement

Before you begin the capacitor replacement process, gather the necessary tools and materials, and ensure that you follow proper safety precautions:

  • Disconnect power to the HVAC system: Turn off the circuit breaker or disconnect switch that supplies power to the unit, and double-check that the power is off using a non-contact voltage tester or multimeter.
  • Discharge the capacitor: Safely discharge the capacitor to prevent electric shock, as described in the “Safety Precautions for Troubleshooting Capacitors” section.

Removing the Faulty Capacitor

To remove the faulty capacitor, follow these steps:

  1. Locate the capacitor: Find the capacitor within the HVAC system, typically inside the condenser unit or air handler.
  2. Take a photo or make a note of the wiring connections: This will help you ensure that the new capacitor is wired correctly. Be sure to note which wires are connected to the “C” (common), “FAN,” and “HERM” (compressor) terminals.
  3. Disconnect the wires: Carefully remove the wires from the capacitor’s terminals using a pair of needle-nose pliers or a small flathead screwdriver. Be sure to handle the wires gently to avoid damaging them.
  4. Remove the capacitor: Unscrew or unclip the capacitor from its mounting bracket and carefully remove it from the unit.

Installing the New Capacitor

To install the new capacitor, follow these steps:

  1. Verify the new capacitor’s specifications: Ensure that the new capacitor’s voltage and microfarad ratings match the faulty capacitor’s ratings and the manufacturer’s recommendations.
  2. Mount the new capacitor: Secure the new capacitor to the mounting bracket using screws or clips, depending on the design of your HVAC system.
  3. Reconnect the wires: Referring to the photo or notes you took earlier, reconnect the wires to the appropriate terminals on the new capacitor. Double-check that the connections are secure and correct.
  4. Test the HVAC system: Reconnect power to the HVAC system and turn it on to ensure that it’s operating correctly. If the system runs smoothly and the capacitor-related issue is resolved, the replacement was successful.

By following these steps, you can safely and effectively replace a faulty capacitor in your HVAC system and restore its optimal performance.

Troubleshooting Intermittent Capacitor Issues

Intermittent capacitor issues can be challenging to diagnose, as they may cause sporadic performance problems that seem to resolve on their own. Let’s discuss some common causes of intermittent capacitor issues and tips on how to troubleshoot and fix them.

Temperature-Related Issues

Temperature fluctuations can impact the performance of capacitors. When a capacitor is exposed to high temperatures, its capacitance value may temporarily change, leading to intermittent issues. Check the following:

  • Check for proper ventilation: Ensure that the system components, including the capacitors, have adequate ventilation and are not exposed to excessive heat.
  • Location: If the capacitor is located near a heat source, consider using a heat shield to protect it from high temperatures.

Loose or Corroded Connections

Loose or corroded connections can cause intermittent capacitor issues, as they may disrupt the flow of electrical current. To troubleshoot connection related problems:

  1. Disconnect power to the HVAC system: Turn off the circuit breaker or disconnect switch that supplies power to the unit, and double-check that the power is off using a non-contact voltage tester or multimeter.
  2. Inspect the capacitor’s connections: Check the wires connected to the capacitor’s terminals, looking for signs of corrosion, loose connections, or damaged insulation.
  3. Clean or replace corroded connections: If you find any corroded connections, clean them using a wire brush or replace them entirely, as needed.
  4. Tighten loose connections: If you find any loose connections, use a pair of pliers or a small flathead screwdriver to gently tighten them.

Failing Capacitors with Intermittent Performance

In some cases, a capacitor may be on the verge of failing but still function intermittently. This can make it difficult to diagnose the issue using standard capacitor testing methods. To troubleshoot a capacitor with intermittent performance, try the following:

  • Monitor system performance closely: Pay close attention to the HVAC system’s performance, noting any patterns or specific conditions that seem to trigger the intermittent issue.
  • Test the capacitor under load: Consult with a professional HVAC technician to perform an under-load test, which can help identify failing capacitors that still function within their tolerance range when tested with a multimeter or capacitor tester.
  • Consider preemptive replacement: If the capacitor is old or nearing the end of its expected service life, consider replacing it as a precautionary measure, even if it passes standard tests.

By addressing temperature-related issues, inspecting connections, and closely monitoring system performance, you can effectively troubleshoot and resolve intermittent capacitor issues in your HVAC system.

Preventative Maintenance for Capacitors

Preventative maintenance can help prolong the life of capacitors in your AC system, reduce the chance of failures, and maintain the system’s overall efficiency. Now we’ll provide some maintenance tips and best practices to help you keep your AC system’s capacitors in top condition.

Regular HVAC System Inspections

Scheduling regular professional inspections for your HVAC system can help identify potential issues early, including those related to capacitors. During an inspection, a trained technician will examine the system’s components, test capacitors, and assess the overall condition of the system. Ideally, you’d want to inspect the capacitors at least once a year, preferably during the spring – before the summer heat kicks in.

Visual Inspections of Capacitors

In addition to professional inspections, you can also perform periodic visual inspections of the capacitors in your HVAC system. Check for signs of damage – for example bulging, leaking, or cracking -as well as any loose connections or mounting brackets. If you notice any issues, consult a professional technician for further assessment and repairs.

Maintain a Clean and Debris-Free Environment

Keep the area around your AC condenser unit clean and free of debris to help prevent damage to capacitors and other components. Regularly clean the condenser unit’s coils and fins, and remove any leaves, grass, pollen or dirt that may accumulate around the unit. This will help maintain airflow, reduce stress on the system, and minimize the chances of capacitor-related issues.

Monitor System Performance

Pay attention to your HVAC system’s performance and take note of any unusual behaviors or changes in efficiency. If you notice signs of capacitor failure, such as difficulty starting, intermittent operation, or unusual noises, address the issue promptly to prevent further damage to the system.

Replace Aging Capacitors

Capacitors have a limited lifespan, and their performance may degrade over time. As a preventative measure, consider replacing capacitors that are nearing the end of their expected service life, even if they haven’t shown signs of failure. This can help prevent unexpected system breakdowns and maintain the efficiency of your HVAC system.

By following these preventative maintenance tips, you can extend the life of your HVAC capacitors, reduce the likelihood of unexpected failures, and keep your system running smoothly and efficiently.

Advanced Capacitor Troubleshooting Techniques

For more complex capacitor-related issues, advanced troubleshooting techniques may be necessary. In this section, we’ll explore some methods for diagnosing challenging capacitor problems, including using specialized testing equipment, analyzing capacitor performance under varying conditions, and consulting with experienced professionals. For most people though, this step is overkill. If you suspect a capacitor is bad, the cost of removing and replacing it minimal compared to the time and expense of specialized capacitor test equipment. Nonetheless, if you want to go down this path, read this next section, otherwise skip to the next section.

Using Specialized Testing Equipment

Standard multimeters and capacitor testers can measure capacitance values, but specialized testing equipment may be required for a more in-depth analysis of capacitor performance. Some advanced testing tools include:

  • Electrolytic Capacitor Analyzer (ECA): An ECA can measure a capacitor’s equivalent series resistance (ESR) and dissipation factor, providing more information about its internal resistance and energy loss.
  • LCR Meter: An LCR meter can measure a capacitor’s inductance (L), capacitance (C), and resistance (R) with high precision, enabling a more accurate assessment of the capacitor’s performance.

Analyzing Capacitor Performance Under Varying Conditions

To thoroughly evaluate a capacitor’s performance, you may need to analyze its behavior under various conditions, such as different temperatures, voltages, or frequencies. Some techniques for doing this include:

  • Temperature cycling: Subject the capacitor to a range of temperatures and monitor its performance to determine if temperature fluctuations are causing issues.
  • Voltage and frequency testing: Test the capacitor at different voltages and frequencies to assess its performance under various operating conditions.

Capacitor-Related Issues with Other AC Components

Problems with capacitors can impact other components in the AC system – it’s important to understand how capacitors and the other components to ensure the whole system works properly. In this section, we’ll discuss the potential impact of capacitor issues on other components and the importance of addressing capacitor problems promptly.

Capacitors and Compressors

A failing or faulty start or run capacitor can lead to problems with the compressor, which is the heart of the HVAC system. When a capacitor isn’t functioning correctly, the compressor may experience the following issues:

  • Difficulty starting: A failing start capacitor may not provide the necessary boost to start the compressor, resulting in hard starts or failure to start at all.
  • Overheating: A faulty run capacitor may cause the compressor to overheat, potentially leading to permanent damage or reduced lifespan.
  • Increased energy consumption: If the compressor struggles to start or operates inefficiently due to capacitor issues, the HVAC system may consume more energy, leading to higher utility bills.

Capacitors and Blower Motors

Similarly, capacitor issues can also impact the blower motor, which is responsible for circulating air throughout your home. Problems with the blower motor related to capacitor issues include:

  • Inconsistent airflow: A faulty run capacitor may cause the blower motor to operate inefficiently, resulting in inconsistent or weak airflow throughout your home.
  • Motor overheating: If the blower motor’s capacitor is failing, the motor may overheat, potentially causing permanent damage or reducing its lifespan.
  • Noise and vibration: Capacitor issues can cause the blower motor to produce unusual noises or vibrations during operation.

Importance of Addressing Capacitor Problems

Addressing capacitor problems promptly is essential to maintaining the health of your HVAC system and preventing damage to other components. If you think a capacitor is failing or faulty:

  • Diagnose the issue: Use the troubleshooting techniques discussed earlier to accurately diagnose the problem.
  • Replace faulty capacitors: If you think that a faulty capacitor is the cause of the issue, replace it promptly to prevent further damage to the AC system.
  • Monitor system performance: Keep a close eye on your HVAC system’s performance after addressing capacitor issues to ensure that other components are functioning correctly and efficiently.

Now that you understand the relationship between capacitors and other AC system components, you can effectively diagnose and resolve capacitor-related issues and maintain the optimal performance of your entire air conditioning system.

Conclusion

In this comprehensive guide, we’ve covered various aspects of troubleshooting and repairing capacitor-related issues in central air conditioning systems. Capacitors play a big role in the operation of an AC system – ensuring the proper functioning of compressors and blower motors. By knowing about the types of capacitors used in AC systems, their functions, and where to find them, you can better diagnose and address capacitor problems.

We’ve explored various troubleshooting techniques, ranging from basic visual inspections to advanced diagnostic methods using specialized equipment. Also, we’ve discussed the importance of preventative maintenance, safety precautions, and the impact of capacitor issues on other AC components.

It’s vitally important to remember that working on an AC system can be really dangerous. Capacitors store lots of electrical energy, and improper handling can result in electric shocks, injuries, or damage to your AC system. It’s best to call in professional help when needed. It’s better to call out a pro rather than risk saving a few bucks to end up in the hospital.

When faced with complex capacitor-related issues or if you need professional assistance, Dallas Heating and Air Conditioning is one of the best AC repair companies in the DFW metroplex. Their experienced technicians can help diagnose and resolve any capacitor problems, ensuring the optimal performance and longevity of your air conditioning system.

By following the guidance provided in this article and seeking professional help when necessary, you can keep your AC running efficiently and avoid costly repairs or replacements due to capacitor-related issues.

AC Repairs – Troubleshooting Air Flow Issues

Do you hear strange noises coming from your air conditioning system? Is the air flow not as strong as it used to be? If so, then troubleshooting air flow issues in your home’s air conditioning system may be necessary. Air conditioning systems are complex and require regular maintenance to ensure they continue running properly. In this article, we’ll provide an overview of how to troubleshoot and identify common air flow problems in your home’s AC system.

Knowing how to troubleshoot your AC system can save you time, money and frustration. Often times, minor issues can be quickly identified and fixed without having to hire a professional technician. However, if any of the components of the system need replacing or repairs need to be made, it’s best to call a professional for help.

Whether you plan on doing some DIY work or hiring a professional for assistance, this article will provide you with the information you need about addressing common issues with your AC system’s airflow. So let’s dive in and take a look at what needs fixing!

Kinked Ductwork

The air conditioning system in your home is like a well-oiled machine, and kinked ductwork can be the wrench that throws it off. Kinks can occur when sections of the ducts are bent or pinched, typically due to installation errors or damage from a pest problem. If you have noticed an unusually low airflow coming from your vents, one of the most common causes is kinked ductwork.

Checking for kinks in your ductwork doesn’t require any special tools; simply inspect each section for signs of bending or pinching. If you find any kinks, try to straighten them out as best you can, making sure not to gently move them to achieve the desired flow.. If this doesn’t work, it may be time to call in a professional who can replace or extend the kinked section of the ductwork. From here, we’ll move on to another potential problem with air conditioning systems: leaky ducts.

Leaky Ducts

Next, let’s look at leaky ducts. Leaky ducts are one of the most common sources of air flow issues in an AC system. They can be difficult to detect since they often occur in areas that are hard to access, such as between walls or in ceilings. Leaks can also be caused by poor installation, loose connections and corroded seals. To inspect for leaks, you’ll need to turn off the power to your AC unit and use a flashlight to look for signs of dust or airflow around any joints or seams. If you find a leak, it should be sealed with mastic tape or caulking compound as soon as possible.

If no leaks are found, it may be time to check your air filters. Clogged air filters can restrict the flow of air into the system, reducing efficiency and putting strain on the motor. It’s important to replace your filter regularly – usually every three months – and make sure they’re not too dirty when installing them back in place.

Clogged Air Filters

The summer sun blazes through the windows of your home. You long for the cool relief that you know your air conditioning system can bring, but instead you hear only a faint whisper of air coming from the vents. The air conditioner is not working as it should, and you must investigate further.

Clogged air filters are one of the most common causes of this issue. The filter works to remove dust and other particles from the air as it passes through, ensuring that clean air is circulated in your home. But if these filters become blocked with debris and dust, airflow will be significantly reduced, causing your AC system to work harder than necessary and reducing its efficiency. To fix this issue, start by replacing or cleaning the filters regularly according to the manufacturer’s instructions.

Inadequate Return Air Pathways

Now that the clogged air filters have been addressed, it’s time to investigate if there are issues with inadequate return air pathways. This can be caused by poor insulation in walls and attic, or blocked vents and registers. To identify this issue, you should inspect all of your ductwork inside the home and check for any obstructions or areas that need to be better insulated. If your system is old, it may also be helpful to get a professional inspection done to make sure your system is running efficiently.

In addition, you should also check for proper size and placement of return air grills throughout the house. The grills should not be too small or far away from the unit; otherwise they will not allow enough air flow into the system. With proper installation and maintenance, these problems can easily be prevented from occurring in the first place. Looking ahead, the next step is to examine any obstructed condenser unit outside of your home which could also affect airflow issues.

Obstructed Condenser Unit

Obstructed condenser unit is another common cause of air flow issues in air conditioning systems. An obstructed condenser unit can restrict the amount of air passing through the system, causing a decrease in efficiency and performance. This obstruction can be caused by dirt, debris, or even overgrown vegetation surrounding the unit. Make sure to keep the area around your condenser unit clean and free of any obstructions.

If you find that your condenser unit is blocked, remove any obstructions and check for any damage to the coils or fan blades. If there is damage, it will need to be replaced before operating properly again. If all else fails, consider calling an HVAC technician to come out and inspect your system for any potential problems that may be causing the obstruction. With this knowledge, they can help identify and resolve your air flow issues quickly and efficiently. Next we’ll look at how an improperly designed or installed duct system can affect air flow.

Improperly Designed Or Installed Duct System

Ah, the joys of an improperly designed and installed duct system. Who doesn’t enjoy a home that is full of hot air, uneven cooling and more? Let me paint a picture for you:

  1. Hot spots in certain rooms;
  2. Cold spots in other rooms;
  3. Blowing air from one room to another;
  4. Unbalanced temperatures throughout the house.

Yes, these are all signs of an improperly designed or installed duct system and can cause major issues with airflow in your home’s air conditioning system. Making sure the duct system is properly designed and installed is essential to having a cool and comfortable home – not to mention energy efficiency! So be sure to have it professionally checked before experiencing any of the above mentioned problems that would otherwise make life unbearable this summer season!

Blower Fan Issues

Blower fan issues can lead to poor air flow in your home’s air conditioning system. It’s important to identify and address these problems before they worsen.

ProblemSolution
Clogged filterReplace filter
Dirty motorClean motor
Bent fan bladeStraighten blade
Worn out or loose fan beltReplace fan belt
Blower fan issues

The first step is to check the filter and replace it if it’s clogged or dirty. Additionally, make sure that the blower motor is clean, as dust and debris can build up over time and prevent adequate air flow. If any of the fan blades are bent, you should straighten them with a suitable tool. This will help ensure that the blades move smoothly when running. Lastly, check for any loose screws or parts that could be causing instability in the fan assembly.

If all of these components are functioning properly, but air flow is still inadequate, then it may be a sign of damaged or worn fan belts which will require further investigation.

Damaged Or Worn Fan Belts

Many times, when the blower fan isn’t working properly, it can be a sign of worn or damaged fan belts. It’s like trying to drive a car with a broken transmission: The engine is running but nothing is happening. Just like cars need functional transmissions to move the vehicle, air conditioners need functional fan belts to move air throughout the system.

Fan belts can wear out over time and cause several problems. If it’s too loose, it won’t move the fan efficiently, or if it’s too tight, it may cause problems with other components in the system. Either way, this can lead to decreased airflow and cooling issues as well as potentially damaging other parts of the air conditioning system.

It is important to inspect your fan belt periodically for any signs of damage or wear. Check for fraying edges, cracks, tears and make sure that they are tensioned correctly. If you discover any issues with your fan belt, have an experienced technician replace it right away before further damage occurs. As soon as your new fan belt is installed, you’ll notice an immediate improvement in airflow and cooling efficiency throughout your home’s air conditioning system. From there, you can move on to inspecting the next component: dirty or frozen evaporator coils.

Dirty Or Frozen Evaporator Coils

If your air conditioning system’s air flow is reduced, dirty or frozen evaporator coils may be the culprit. It’s important to check for this problem if your unit has been running for a long time without being serviced. The evaporator coil is located in the indoor unit and can become clogged with dirt and dust over time. If left unchecked, it can cause the coil to freeze over, preventing cool air from entering your home. To prevent this from happening, you should regularly clean or replace the filter in your unit and check for any other signs of dirt buildup on the coils. A professional HVAC technician should be able to diagnose the issue and determine if it needs to be replaced or simply cleaned.

The next step in troubleshooting air flow issues in your home’s AC system is to look for collapsed or disconnected ducts. Poorly insulated ducts are also prone to collapse due to pressure imbalances caused by changes in temperature or humidity levels inside the home. If you suspect that this may be an issue, contact a professional HVAC technician immediately to inspect and repair any damaged ducts before further damage occurs. With proper maintenance, these types of issues can easily be avoided.

Collapsed Or Disconnected Ducts

Now, let’s move on to collapsed or disconnected ducts. These are common issues in homes with an air conditioning system. Ducts can become damaged due to wear and tear over time, or they may have been installed improperly. In either case, it’s important to repair the issue as soon as possible. If the issue isn’t corrected, air will not be able to flow properly throughout your home. This can result in uneven cooling and higher energy bills.

One way to identify a collapsed or disconnected duct is to look for obvious signs such as cracks, holes, or gaps in the ductwork. You may also hear strange noises coming from your air conditioning system when it is running. If you suspect that there is an issue with one of your ducts, it is best to contact a professional HVAC technician for assistance. They will be able to inspect the ducts and determine if any repairs need to be made before the air conditioning system can run efficiently again. With that said, let’s move on to discussing zone control system issues in our next section.

Zone Control System Issues

Issues with your zone control system can cause problems with the air flow in your home’s air conditioning system. These systems are designed to regulate the temperature of multiple rooms in a home. If one or more of the zones isn’t working properly, it can impact the air flow throughout your home. You’ll want to check that all of the dampers are open and working correctly to ensure proper air flow. Additionally, make sure that any thermostats within each zone are set correctly and communicating with their respective dampers. If any of these components aren’t functioning as they should, it could be causing a disruption in the air flow throughout your home.

If none of these issues seem to be at fault, then it could be an issue with your air register or supply vent obstructions. Clogged or blocked vents can result in reduced airflow, so you’ll want to make sure that all vents are clear and not obstructed by dirt or debris.

Air Register Or Supply Vent Obstructions

After troubleshooting your home’s zone control system, the next issue to consider is air register or supply vent obstructions. This can be a common cause of air flow issues in an air conditioning system. The obstruction of the registers and vents can cause blockage of the circulation of conditioned air.

Here are three ways that this can occur:

  • Objects blocking the vents
  • Dust buildup on the inside of the registers
  • Insufficiently sized ducts for large homes

Inspecting for obstructions will involve looking around the registers and vents for anything that may be blocking it, such as furniture or toys. It is also important to check for dust buildup and larger objects such as rugs blocking ventilation. Additionally, if your home has recently expanded, you should have a professional inspect the size and capacity of your ducts to make sure they are adequate enough to provide proper airflow throughout the house. Without these measures taken, uneven distribution of conditioned air can lead to pressure imbalances in different parts of your home.

Air Pressure Imbalances

Air pressure imbalances can cause air flow issues in your home’s air conditioning system. To check for air pressure imbalances, use a manometer to measure the pressure difference between the supply and return sides of the system. If there is a significant difference—more than 0.5 inches of water column—it could be caused by a restriction in one or more places of the system, including the filter, ducts, or registers. It may also be caused by an unbalanced system from incorrectly sized components or poorly designed ductwork.

If this is the case, you should contact an HVAC professional to assess and address the issue. They may need to adjust or replace parts of your air conditioning system to ensure optimal performance and airflow. With their help, you can make sure that your home’s air conditioning system is running at its best capacity. This will improve energy efficiency and comfort levels in your home.

The next step is to examine any potential air leaks in the home that could be affecting your AC’s performance.

Air Leaks In The Home

The summer sun beats down, radiating a sweltering heat. The air conditioning system kicks in, but fails to adequately cool the home. Air leaks in the home are one of the many possible causes of this issue.

Air leakage into a home is caused by any gaps or cracks located around doors and windows or in the walls or roofing. Gaps between the windows and their frames, as well as around door frames, should be sealed with caulking or weather stripping to ensure that no outside air is getting into the home. Additionally, any holes in walls and roofing should be patched up with insulation materials to prevent infiltration of outside air. Fixing these issues will stop any unwanted airflow from entering the home, allowing your cooling system to work more efficiently and effectively cool down your home.

Conclusion

In conclusion, our homes are meant to be comfortable respites from the outside world. But when our air conditioning systems aren’t working properly, it can feel like we’re living in a sauna! It’s frustrating, especially when you don’t know what’s causing the problem. Fortunately, with a little detective work and troubleshooting, most air flow issues can be fixed.

I found out the hard way that kinked ductwork, leaky ducts, clogged filters and inadequate return air pathways can all contribute to airflow problems. And even if these issues have been addressed, you still have to watch out for obstructed condenser units and zone control system issues. Who knew?

But hey, I guess that’s why they call it “troubleshooting.” It’s a hassle sometimes but with patience and attention to detail it’s possible to identify and fix the issue so you can get back to enjoying your cool and comfortable home.

AC Repairs – Troubleshooting Blocked Condensate Drain

Air conditioning systems are like intricate puzzles, each requiring careful attention and troubleshooting in order to identify and repair problems. When the condensate drain is blocked, an air conditioner will not work properly and can lead to costly repairs if it is not fixed quickly. This article will provide a comprehensive introduction to troubleshooting a blocked condensate drain in an air conditioning system. It’s one of the AC troubleshooting articles we publish to help homeowners understand how an AC system works and how to diagnose common issues.

The purpose of this article is to provide readers with a general understanding of what can cause a blocked condensate drain, how to diagnose the problem, and how to fix it. It will also explain some of the common signs that indicate there may be an issue with the condensate drain.

Understanding the common causes of a blocked condensate drain can help homeowners save time and money on repairs. With this knowledge, they can more accurately diagnose issues and determine if they need professional assistance or not. Having insight into these issues can also empower homeowners to make informed decisions when purchasing an air conditioning system for their home.

Causes Of Blocked Condensate Drain

Air conditioning systems require a condensate drain in order to carry away excess moisture and humidity. Blockage of the condensate drain can be caused by a range of factors, including biological growth, debris, and scale buildup. These blockages can cause water leakage from the air conditioning unit, resulting in property damage or potential health risks such as mould growth. In order to prevent this from occurring, it is important to identify the causes of blocked condensate drains and take steps to remedy them.

Common causes of blocked condensate drains include debris such as dirt, dust and leaves that may have been sucked into the system; scale buildup due to hard water; corrosion of metal components; and biological growth such as algae or mould. In some cases, inadequate maintenance or poor installation may also lead to blockage. The location of the drainage system should be identified in order to determine its condition and any blockages present.

How To Locate The Drainage System

In order to address a blocked condensate drain, it is necessary to locate the drainage system. It is important to note that in most cases, the condensate drainage system will be located outside of the unit. In some instances, however, it may be found inside the unit. The exact location of the drainage system can be identified by consulting the user manual for the specific make and model of air conditioning unit in use.

Once the location of the drainage system has been determined, it is then possible to begin preparing for troubleshooting. It may be useful to obtain a few tools and supplies in advance so that any potential issues can be addressed quickly and effectively.

Preparing For Troubleshooting

When troubleshooting a blocked condensate drain, it is important to be well prepared. First, gather the necessary tools and materials. These could include a flashlight, screwdriver, pliers, pipe cleaner and possibly a vacuum. It may also be helpful to have on hand a manual for the air conditioning unit or access to an online database of information about the unit. Additionally, make sure that the power to the air conditioning system is off before beginning any work on it. Once all of these preparations have been made, it is time to check the indoor unit for signs of trouble.

Checking The Indoor Unit

The indoor unit of an air conditioning system is generally located on the side of the indoor AC unit (refer to image above for an example of the condensate drain on a Carrier system) which contains the evaporator coil. To check for a blocked condensate drain, it is necessary to inspect the indoor unit for signs of water leakage or damage due to overflow. If any signs of leakage are present, then it is likely that the condensate drain is blocked. In this case, further investigation may be necessary, such as removing the access panel and inspecting the evaporator coils and drainage system. Additionally, visual inspection should also be conducted in order to determine if any dirt or debris is blocking the drains, which can cause water accumulation and in turn lead to water leakage.

Clearing Clogs From Drains And Pipes

As the old adage goes, “An ounce of prevention is worth a pound of cure”. Air conditioning troubleshooting should always start with preventive maintenance and service of the drain line to avoid clogs in the future. The drainage system for air conditioners can become blocked due to accumulated dust and debris, which needs to be cleared out regularly. There are several methods for clearing clogs from drains and pipes, such as using a plumber’s snake or a garden hose connected directly to the outdoor condenser unit. Additionally, chemical drain openers can be used to dissolve any clogs if necessary. It is important to note that these chemical drain openers must be handled with care and according to safety guidelines provided by the manufacturer. After clearing all clogs from drains and pipes, it is essential to test the main drain line with a wet/dry vacuum to ensure that no blockages remain. This will help prevent future issues with air conditioning trohttps://www.dallasheatingac.com/troubleshooting/ubleshooting related to blocked condensate drains.

Testing The Main Drain Line With A Wet/Dry Vacuum

Before testing the main drain line, the user should make sure that the power is turned off to the unit. A wet/dry vacuum should be used to test for blockages in the main drain line. The vacuum should be attached to a piece of flexible tubing that is long enough to reach from the vacuum hose connection to inside the condensate pan. It is important to ensure that all parts are securely connected and sealed before beginning the test.

If any water or debris is discovered in the condensate pan, it must be removed with a cloth or paper towel before proceeding further. If no blockage is found, then it may be necessary to clean and disinfect an air conditioning system as detailed in the subsequent section.

Cleaning And Disinfecting An A/C System

Cleaning and disinfecting an air conditioning system is a necessary part of routine maintenance. To ensure proper functioning of the system, it is important to use a biocide or fungicide that is compatible with the type of material used in the system. The biocide should be applied every six months using a foam applicator gun. It is important to follow manufacturer instructions for dilution rates and application procedures.

After application, it is imperative to flush the system with clean water for at least 15 minutes to ensure all residue has been removed. This will help preserve the components and reduce the risk of corrosion or clogging due to bacterial growth. Once complete, check all seals and fittings for leaks before turning on the system again. With these steps taken, an air conditioning unit can remain in optimal condition for longer periods of time. Moving forward, unclogging stubborn blockages may need to be addressed in order to maintain peak performance of the unit.

Unclogging Stubborn Blockages

When a blocked condensate drain is particularly stubborn, there are a few options for unclogging the drain. One method is to use chemical solutions, such as vinegar and baking soda or specialized cleaning agents. These solutions can be poured into the drain to dissolve whatever debris is clogging it. Another option is to use a wet-dry vacuum cleaner with an appropriate attachment to suck out any clogs in the pipe. In some cases, using a plumbing snake may be necessary to break up and remove large pieces of debris that have become lodged in the pipe.

In all cases, it is important to wear protective gear when attempting to unclog a blocked condensate drain, as there may be dangerous chemicals or fumes present and exposure should be limited. After unclogging the drain, replacing any fittings, pipes, and joints that are damaged or corroded will ensure proper drainage moving forward.

Replacing Fittings, Pipes, And Joints

At first, it might seem that clogging a condensate drain is not a serious issue. After all, what does it matter if a little water accumulates in the pan below the air conditioner? Unfortunately, ignoring this issue can lead to much bigger problems. When fittings, pipes, and joints become corroded or blocked due to accumulated water, they need to be replaced.

Replacing these components can be quite costly and labor-intensive. It is critical to regularly inspect and clean the condensate drain in order to prevent this from happening. If the blockage is detected early enough, it may be possible to unclog it without replacing any parts. Regular maintenance will help keep the system running smoothly and efficiently while minimizing repair costs associated with a blocked drain. Moving forward, taking preventive measures such as regular maintenance of an air conditioner are essential for optimal operation and longevity of the system.

Advantages Of Regular Air Conditioner Maintenance

Regular air conditioner maintenance is highly recommended for optimal performance and efficiency. It can help to extend the life of an air conditioning system and reduce energy costs by up to 15%. Regularly checking filters, inspecting coils, and cleaning drains are important tasks that should not be overlooked.

By conducting regular inspections of the air conditioner’s components, any potential problems can be detected early on. This helps to prevent further damage from occurring or the need for costly repairs. Additionally, regular maintenance ensures that all parts of the system are running at peak efficiency, thus reducing energy consumption and saving money in the long run.

Conclusion

In conclusion, air conditioning troubleshooting is a crucial part of maintaining the ideal environment in any space. Regularly checking and cleaning the drainage system can help prevent blockages from accumulating and causing more serious issues. While it may seem daunting to tackle A/C repairs, having a basic understanding of the components and steps involved can make the task much easier. Taking advantage of the benefits that regular maintenance provides is like a breath of fresh air; it ensures that your air conditioning unit will remain in top condition for years to come. Therefore, don’t hesitate to take action when you notice any signs of blocked drains or other issues with your A/C—acting swiftly will save you time, money, and stress in the long run.

Avoid AC Breakdowns: Homeowners’ Guide To Summer Preparedness

Summer in North Texas is no walk in the park. As temperatures soar and the humidity rises, it’s crucial that homeowners take steps to prepare their home’s air conditioning systems for the long summer ahead. The dreaded AC breakdown is a homeowner’s worst nightmare — but with our guide to summer preparedness, you can avoid spending sleepless nights sweltering in the heat and not have to worry about emergency AC repairs.

Picture this: You’re just settling into bed after a long day, when suddenly your air conditioning unit shuts off. You rush to check the thermostat, only to find out that the temperature has skyrocketed and your AC isn’t cooling anymore! No one wants to experience this kind of discomfort, so let us help you figure out how to make sure it doesn’t happen.

Our guide provides all of the information you need to stay cool during those hot summer days in North Texas. With simple tips and helpful advice, we’ll show you how to get your AC running smoothly and keep it running through even the hottest days of summer. Read on for all the info you need for a cool and comfortable summer!

AC Maintenance Checklist

As a North Texas homeowner, it’s important to be prepared for the warm summer months. A good first step is to make sure your air conditioner is in top shape. To help you get started, here’s a checklist of maintenance tasks you should do before the summer heat hits:

  • Check and replace air filters regularly. Dirty or clogged air filters can reduce airflow and cause major AC repairs down the line.
  • Check your thermostat settings and adjust if necessary. Make sure the temperature is set no lower than 78°F so that your AC doesn’t overwork itself.
  • Inspect your ducts for any leaks or damage to ensure optimum performance.
  • Clean off any debris from around your unit and clear away any branches or leaves. Additionally, check that all drain lines are clear of any obstructions.

These simple steps will go a long way towards keeping your AC running smoothly during the hot summer months, saving you time and money on potential repairs. Now let’s move on to system cleaning and filtering tips…

System Cleaning And Filtering Tips

Now that you have your AC maintenance checklist completed, it’s time to move onto system cleaning and filtering tips. To maintain the life of your AC system, you’ll want to clean and replace air filters regularly. This will help keep dirt and other debris from clogging up the system which can lead to poor performance.

When changing the filter, make sure to check it for any signs of damage or wear. If it looks like there is an issue, replace it immediately with a new one. You should also take a few moments each month to visually inspect the indoor and outdoor units for any dirt or debris buildup. If left unchecked, this can lead to inefficiencies in cooling efficiency as well as costly repairs down the line.

Once you’ve cleaned the outside unit and replaced your filters, you’ll want to adjust your thermostat settings correctly so that your AC isn’t running too hot or cold during summer months. This will ensure that your home remains comfortable throughout peak temperatures while still keeping energy costs in check.

Thermostat Settings

Making sure your thermostat is set properly can help you avoid costly AC breakdowns. During the summer months, your thermostat should be set to 78 degrees or higher. This will keep your AC system from running too often and working too hard, which could lead to a breakdown. It’s best to adjust the temperature in small increments until you find the sweet spot that keeps your home cool and comfortable without overworking your AC unit.

If you’re away for long periods of time, it’s important to remember to turn up your thermostat a few degrees while you’re gone. That way, when you return home, you won’t have to wait hours for it to cool down—and you’ll save money on energy bills in the process! By being mindful of how and when you use your thermostat, you’ll be better prepared for the hot Texas summers ahead. Let’s move onto troubleshooting common issues with AC units so that we can make sure our homes are ready for whatever Mother Nature throws our way!

Troubleshooting Common Issues

Ah, summertime in North Texas. The sun is scorching and the AC is running full-blast. But what’s this? Your trusty air conditioning unit is making strange noises or not cooling your home efficiently? Don’t despair! Here are a few tips to troubleshoot common issues that may arise during the summer months:

  • Check the filters: Dirty or clogged air filters can restrict airflow, causing increased energy costs and reduced cooling power. Change them once a month for optimal performance.
  • Inspect the ducts: Make sure all of your ducts are properly sealed and insulated to prevent heat transfer from room to room.
  • Check the thermostat: If your thermostat is too close to sources of heat, such as lamps and televisions, it may be giving false readings. Move these items away from the thermostat and make sure it’s set correctly so you don’t waste energy cooling an empty house.

These simple steps can help ensure your AC runs smoothly all summer long. And while they address some of the most common issues, they won’t do much if your home isn’t properly insulated. So let’s take a look at how insulation can reduce heat load in your home and keep it cool even on hot summer days.

Insulation To Reduce Heat Load

As we have explored the common issues that can lead to air conditioner breakdowns, it is time to move on to preventive measures. One of the most effective ways for North Texas homeowners to avoid AC breakdowns during the hot summer months is by ensuring adequate insulation. Proper insulation helps reduce the total heat load of your home, making it easier for your air conditioner to keep up with cooling demands.

It is important to make sure that all areas of your home are properly insulated in order to get the most out of your system. This includes attics, walls, windows, and even crawlspaces. Consider investing in a professional inspection to ensure that all areas are properly insulated and free from any air leaks or gaps. Doing so will help maximize your comfort levels while also keeping energy costs low.

This brings us one step closer towards understanding how North Texas homeowners can make sure their cooling systems are ready for summer preparedness. The benefits of professional inspections are numerous; next we’ll explore why they’re so important.

Benefits Of Professional Inspections

Have you ever been stuck on the side of the road with a broken-down AC? Those hot summer days can be particularly difficult, especially if you don’t have access to a mechanic right away. But with regular inspections and tune-ups by a professional, you can avoid the hassle of an AC breakdown.

BenefitReason
Increased EfficiencyProfessional inspection helps identify minor problems that could lead to decreased performance over time.
Longer LifespanRegular maintenance prevents parts from wearing out too quickly.
Improved SafetyA professional can identify potential safety hazards and make necessary repairs quickly.
Early Detection of ProblemsWith an experienced eye, professionals can spot problems before they become more serious or costly to fix.
Lower Repair CostsCatching small issues early on can help keep repair costs down in the long run.
Improving Indoor Air QualityA professional inspection can identify issues with your system’s air filters, coils, and other components that can impact indoor air quality. By addressing these issues, you can improve the air quality in your home and reduce allergy symptoms.
Benefits Of Professional Inspections

The benefits of having a professional inspect your AC system are undeniable – not only will it save you time and money in the future, but it will also increase your peace of mind knowing that your system is running smoothly and safely. Taking this small step now can be highly beneficial for both your comfort and wallet in the long run!

Regularly Scheduled Tune-Ups

Once you’ve taken advantage of professional inspections to ensure your AC system is ready for the summer, it’s time to consider regularly scheduled tune-ups. It’s easy to forget how hard your air conditioner works during the hot months, but without proper maintenance and regular check-ups, you could be faced with a breakdown in the middle of summer. Regular tune-ups can help identify any small issues that might become major problems if left unchecked.

It’s also important to keep an eye on the usage of your AC system. By utilizing programmable thermostats, you can better monitor its performance and ensure it is working efficiently and effectively all summer long. This will not only help cut down on energy costs, but it will also reduce the risk of premature wear and tear on your unit. With some simple preventative measures like these, North Texas homeowners can enjoy a comfortable summer with minimal stress and worry about their AC system.

Utilizing Programmable Thermostats

Making use of programmable thermostats is a great way for North Texas homeowners to avoid AC breakdowns during the summer season. These devices make it possible to set temperatures in advance, allowing users to maintain optimal comfort while also reducing energy costs. Programmable thermostats are easy to install and can be programmed with a few simple steps.

By setting temperatures when people are away or asleep, homeowners can ensure that their home stays at a comfortable temperature without wasting energy. They can also be adjusted to turn on the air conditioning at certain times of the day, so that homeowners don’t have to worry about waking up in an uncomfortably hot house during the summer months. By using a programmable thermostat, North Texas homeowners can save both energy and money while avoiding costly AC breakdowns.

Programmable thermostats are an easy and cost-effective way for North Texas homeowners to save energy and money throughout the summer months. With proper usage and maintenance, these devices help homeowners keep their AC systems running smoothly and efficiently, ensuring maximum comfort all season long. Through mindful use of this technology, households can take proactive steps towards protecting their AC units from wear and tear, avoiding costly repairs down the road. As such, investing in a programmable thermostat is an excellent way for North Texas homeowners to prepare for the upcoming summer season. With a few simple adjustments, they can enjoy optimal comfort while saving energy and money throughout the year. Transitioning into the next section about replacing old AC units, it’s important for homes that still have outdated models to consider upgrading them as soon as possible before any problems arise.

Replacing Old AC Units

As the summer heat intensifies and your old AC unit struggles to keep up, it may be time to consider replacing it. The thought of replacing an entire system can seem intimidating and expensive, but doing so could save you money in the long run.

Image a reliable air conditioner that rarely needs repair, keeping your home at a comfortable temperature all summer long. You can make this dream a reality with some research and preparation. Consider the size of your home, budget, energy efficiency ratings, warranties, and more before selecting the right unit for you. Additionally, look for rebates or tax credits available in North Texas to help offset costs.

Finally, hiring a professional contractor who specializes in installing AC units will ensure that your new system is installed correctly and safely. A qualified contractor can also provide maintenance services to help keep your new AC running smoothly for years to come.

Frequently Asked Questions

How Often Should An AC System Be Tuned-Up?

Maintaining your AC system is an important part of keeping it in peak condition. One way to do this is to have regular tune-ups done. But, how often should an AC system be tuned-up?

Tune-ups are essential for ensuring that your AC system works efficiently and reliably during the summer months. Generally, you should have a tune-up performed on your AC unit annually. During this process, a qualified technician will inspect the system components, check for signs of wear and tear, clean or replace any parts that are not working correctly, and adjust settings as necessary. This service can help identify potential problems before they become major issues. Furthermore, it can also help extend the life of your AC system by preventing breakdowns and other common problems caused by improper maintenance.

Therefore, scheduling an annual tune-up for your AC system is one of the best ways to prepare it for summertime use. Regular maintenance can minimize emergency repairs and keep your cooling bills low throughout the year!

Can I Save Money On Energy Bills By Using A Programmable Thermostat?

With the sweltering Texas heat of summer bearing down, AC systems can take a beating. But there are ways to help keep it running efficiently and maintain its lifespan. One way is by using a programmable thermostat – which could save you money on energy bills too!

Programmable thermostats have come a long way since their invention; from simple digital versions to “smart” or “WiFi” versions that can be controlled remotely from your phone. This allows you to set the temperature based on when you’re home or away, as well as adjust different temperatures in different rooms. With this type of control, you can save up to 10% more on your energy bills than with a non-programmable thermostat. Plus, turning off HVAC systems when not needed helps reduce wear and tear on them, further extending their lifespan.

Energy savings aside, using a programmable thermostat is an easy and effective way to help ensure your AC system keeps running smoothly throughout the summer season. Not only will it save you money in energy costs, but it’ll also extend the life of your AC system so that you won’t have to worry about costly repairs or breakdowns when the heatwave hits.

How Can I Check If My Insulation Is Sufficient To Reduce Heat Load?

When it comes to keeping cool in the summer, checking if your insulation is sufficient to reduce heat load is a major factor. Proper insulation not only keeps the heat out of your home but also helps you save on energy costs. With that said, how can you tell if your insulation is up to par?

There are several ways to check your insulation’s effectiveness. Firstly, look around doors and windows for any gaps or cracks where air may be leaking in or out. It’s important to seal these off with caulk or weather-stripping to reduce air leakage and help keep the temperature inside stable.

Additionally, consider having an energy audit done on your home as they can identify weak spots and areas that need additional insulation. You can even do this yourself by using an infrared thermometer to measure interior wall temperatures and compare them with exterior wall temperatures during different times of day. Doing this will help you determine if more insulation is needed in certain areas of the home.

Finally, you should also be aware of the type of insulation installed in your home as some materials are better suited for specific climates than others. For instance, cellulose insulation works best in colder climates, while fiberglass batt insulation works well in warmer climates like Texas’s. Knowing which type of insulation works best for your climate will help ensure that you’re getting the most out of it and reducing heat load effectively.

To sum up, there are several steps homeowners can take when checking whether their current insulating set-up is providing adequate cooling protection from the summer heat:

  • Inspect surrounding areas around doors and windows for any gaps or cracks where air may be leaking in or out;
  • Have an energy audit done on the house;
  • Use an infrared thermometer to measure interior wall temperatures; and
  • Identify which type of insulation works best for the climate.

Taking these steps will help ensure that your home stays cool all summer long without wasting energy!

What Is The Typical Lifespan of an AC Unit and When Should I Consider Replacing It?

Heating, Ventilation, and Air Conditioning (HVAC) units can be a major asset to the comfort of a home. However, they require regular maintenance and sometimes even replacement in order to keep them running efficiently. In this article we’ll discuss the typical lifespan of an air conditioning unit and when it is time to consider replacing it.

An AC unit has an average lifespan of around 10-15 years. This number can change drastically depending on how well you maintain it. Regularly changing out your filters, scheduling repairs for any issues that arise, and checking for any signs of wear and tear are key elements in helping your system last longer. Additionally, the climate you live in will also affect the life expectancy of your unit; if you live in a hot area with high humidity levels, then it might not last as long as someone who lives in a cooler climate.

Here are a few tips to help ensure your AC unit lasts its full lifespan:

  1. Change out your filters regularly to keep dust and debris from getting into the system and clogging up vital components like fans and coils.
  2. Have your unit inspected yearly by a professional HVAC technician who can spot potential problems before they become bigger issues down the road.
  3. Make sure to use an energy efficient thermostat setting so that you’re not overworking your system when temperatures start climbing during summer months.

It’s important to remember that AC units are investments – if properly maintained and taken care of they can last for many years without needing repair or replacement. However, if these steps aren’t followed then you may find yourself needing to replace it sooner than expected due to costly repairs or breakdowns that could have been avoided with regular maintenance checks and upkeep on the unit itself. So keep these tips in mind and enjoy a worry-free summer indoors!

Conclusion

Summer in North Texas can be a scorcher. Without proper preparation, your AC system could be headed for a breakdown. Taking the necessary steps to keep your AC system running smoothly and efficiently can save you from a lot of frustration and costly repairs.

It’s important to tune-up your AC system regularly and check insulation levels to make sure that your home is not suffering from an unnecessary heat load. A programmable thermostat can help you save on energy bills by ensuring that you are only cooling when necessary. Finally, if your unit is getting older, it may be time to consider replacing it so you don’t wind up in an uncomfortable and expensive situation.

Preparing for summer in North Texas is like packing your bags before taking off on a long journey – without the right tools, supplies, and guidance you won’t get very far. Take the time now to make sure your AC system is ready for the hot months ahead because being unprepared is like trying to drive with an empty gas tank – it won’t end well!

AC Repairs – Troubleshooting Clogged Evaporator Coils

This HVAC article brought to you by Dallas Heating and Air Conditioning as part of our air conditioning troubleshooting series designed for homeowners to understand how their AC system works, what can go wrong, and how it can be fixed.

The efficient operation of an air conditioning system is dependent on a number of factors, one of the most important being evaporator coils. When clogged, these coils can cause a variety of issues that must be addressed in order to ensure proper functioning. This article will discuss troubleshooting techniques for addressing clogged evaporator coils, as well as their potential causes and solutions.

Evaporator coils play an integral role in the cooling process within an air conditioning system. As air passes over the coil, the refrigerant absorbs heat from the air and transfers it outside the building, allowing for cooling within the unit. However, when this coil becomes clogged with dirt and debris, it can impede its ability to absorb heat efficiently and thus reduce its performance capacity.

In order to maintain proper functioning within an air conditioning system, it is essential to address any issues related to clogged evaporator coils in a timely manner. The following sections will discuss common causes of obstructed evaporator coils as well as troubleshooting techniques for restoring their performance capacity.

What Are Evaporator Coils?

A split-system central air conditioner includes two units: an indoor unit, which typically has a furnace and evaporator coil or fan coil, and an outdoor unit, which is often referred to as the air conditioning unit. Both units contain a coil that is critical to the air conditioning process. Inside the home, the evaporator coil, also known as the cooling coil, is located on the air intake side of the fan coil or the outlet side of the furnace. Its main purpose is to extract heat from indoor air, allowing the blower fan to circulate cool, refreshing air throughout the home.

The condenser coil, located in the outdoor unit, releases the heat that’s been captured outside. Most evaporator and condenser coils are made of copper tubing with thin, aluminum fins. Although there are other coil designs and compositions, such as all-aluminum or spine fin coils, the airflow across the coil is essential for transferring heating energy in and out of the home.

What is an evaporator coil and why is it so important in air conditioning systems? Evaporator coils are a key component of the air conditioning system, which helps to circulate cool air into a space. The coil works by drawing hot air from the outside and transferring it to the inside through a refrigerant. As the refrigerant passes through the coils, heat is released and cold air is produced. This process is known as evaporative cooling. The evaporator coil helps to keep indoor temperatures comfortable while providing efficient energy usage.

The importance of evaporator coils lies in their ability to regulate air temperature indoors, while also helping reduce energy costs by providing efficient cooling. Without them, homes and businesses would not be able to enjoy comfortable temperatures or save on energy bills. Therefore, it is essential that these coils remain in proper working order at all times.

Signs Of Clogged Coils

Clogged evaporator coils can be difficult to identify as the symptoms are often subtle. It is important to be aware of the signs that an air conditioning system may have clogged coils in order to take action before more serious damage can occur. Generally, customers will notice a decrease in their air conditioner’s performance or efficiency when the evaporator coils become blocked. This could manifest itself through reduced cooling power, increased energy bills, musty odors, or excessive condensation on windows and walls. Additionally, the AC unit may make louder noises than usual or be struggling to keep up with demand. These signs should not be ignored as they indicate that there is an issue with the evaporator coils that needs to be addressed promptly. The next section will discuss potential causes of clogged evaporator coils.

Causes Of Clogged Coils

Evaporator coils can become clogged due to a number of different causes, like a swarm of bees amassing in the air conditioning unit. These coils are responsible for dissipating heat, which is why they’re so important to the functioning of an AC system. When they become blocked, it can cause all sorts of problems.

The primary causes of clogged evaporator coils include:

  • Dust and dirt build-up: Dust and dirt that accumulates in the system over time can hinder airflow and result in clogged evaporator coils.
  • Inadequate cleaning and maintenance: If the unit isn’t regularly cleaned and maintained, dirt and debris will start to accumulate in the evaporator coils.
  • Poor installation: A poor installation job can lead to a less efficient system, which means more dust and debris will get inside the coil.

The consequences of clogged evaporator coils are far-reaching as they can cause everything from decreased energy efficiency to higher utility bills. Regular cleaning and maintenance is key to avoiding this problem, as well as proper installation when replacing an old system or installing a new one. With these precautions taken, you can prevent your AC system from suffering due to clogged evaporator coils. As such, safety precautions should be observed when troubleshooting an AC with clogged evaporator coils.

Safety Precautions

It is essential to take safety precautions when troubleshooting ac systems. Protective gear such as safety glasses, gloves, and a face mask should be worn to protect against debris and other particles that may be present. Also, remove any jewelry that could potentially get caught in the system. Furthermore, it is important to unplug the power source before conducting any maintenance on the unit. Additionally, it is advisable to turn off all water supplies to avoid any potential flooding.

When cleaning or servicing the evaporator coils, ensure that no liquid comes into contact with electrical components. To prevent this, use only approved cleaning solutions or de-greaser products and follow label instructions carefully. Additionally, it is best practice to clean coils with a soft brush or vacuum attachment and not sharp objects or spray cleaners directly onto live circuits. With these safety measures in place, one can proceed confidently with coil cleaning operations.

How To Clean The Coils

The evaporator coils of an air conditioning system are essential for cooling the air, but when clogged, these components can cause a variety of issues. Cleaning the coils is necessary to ensure proper functioning and extend the life of the system. Here’s how:

  • Turn off the power breakers for the AC system before starting any work.
  • Remove all panels that may be blocking access to the evaporator coils.
  • Vacuum dirt and debris off of each coil with a soft-bristled brush attachment.
  • Use a coil cleaning solution or mild detergent to dissolve dirt and grime further.
  • Rinse off each coil with a wet cloth or towel until clean.

Cleaning the coils is an important step in resolving AC issues due to clogs, but there are times when it pays to call in a professional. Knowing when that time has come is key in getting your system back up and running efficiently.

When To Call A Professional

If the clogged evaporator coils cannot be resolved with the steps outlined above, then it is time to call a professional. Hiring a professional can help ensure that the problem is identified and fixed correctly. A professional will have the necessary tools and experience to diagnose and repair any issues with the evaporator coils. Additionally, they may be able to provide advice on how to prevent similar problems from occurring in the future.

It is important to remember that if the clogged evaporator coils are not properly addressed, then larger problems can arise. This could include costly repairs or even replacement of parts or systems. By hiring a professional, these risks can be minimized and any further damage avoided.

Maintenance Tips For Evaporator Coils

Maintaining evaporator coils is important for ensuring their proper functioning and preventing the need for costly repairs. Regular cleaning and inspection of evaporator coils will help maximize their performance and extend their lifespan. Here are a few maintenance tips that can be used to ensure the coils stay in good condition:

  1. Clean the coils regularly with a brush or vacuum cleaner. This will remove any dirt, dust, pollen, or other debris that can accumulate on the surface of the coil and reduce its efficiency.
  2. Check the condensate drain line periodically to make sure it is not blocked or clogged with debris. A clogged drain line can cause water to back up into the system, leading to inefficient operation and potential damage to other components.
  3. Inspect the insulation around the evaporator coils to ensure it is in good condition and free of any cracks or holes that could allow air leakage inside the system.
  4. Have an HVAC technician inspect the evaporator coil annually to look for any signs of wear or damage that may not be visible during regular maintenance checks.

Following these maintenance tips can help keep your evaporator coil in top working condition and prevent future problems from arising. Regular cleaning, inspection, and professional service are all essential components of maintaining your HVAC system properly.

Conclusion

Clogged evaporator coils can be a nuisance to deal with, but having the proper knowledge and taking the necessary safety precautions can make the process easier. Keeping up with regular maintenance of evaporator coils can also reduce the chances of clogging, saving time, money and energy.

Despite all of this information, there are still instances where a professional may need to be called in order to properly diagnose and fix any potential issues. Even though it may seem like an unnecessary expense at times, this will prevent bigger issues from arising down the road that could cost even more money to fix.

Irony aside, clogged evaporator coils are something that should not be taken lightly as they can lead to major problems if left untreated. Knowing how to identify signs of clogs and how to properly maintain them is key in preventing future headaches caused by these pesky little coils.

How To Hire The Right AC Repair Company

When it comes to the maintenance and repair of air conditioning systems, it is important to hire the right company for the job. This article will provide a detailed guide on how to hire the right AC repair company. It will outline key factors that should be considered when hiring an AC repair service provider as well as helpful tips to ensure that the desired outcome is achieved. Additionally, this article will also explain why it is essential to hire a licensed and qualified technician for the job.

Air conditioners are complex machines that require specialized skills and experience in order to diagnose and repair issues efficiently, so it’s important to choose a reliable AC repair company that has years of experience in dealing with air conditioning systems of various sizes and complexities. Furthermore, they must have access to quality replacement parts and must be able to offer warranties on their services.

Finally, hiring an experienced technician who is licensed and insured can help give peace of mind knowing that any repairs done on one’s air conditioning system will be performed according to industry standards. By following these guidelines, homeowners can rest assured knowing that they have hired the right AC repair company for the job.

Researching Local Companies

When searching for an air conditioning repair company, it is important to research local businesses. Start by searching for them online, in places like Google of Bing maps. You can also ask friends, family, or colleagues for referrals. It is also a good idea to read online reviews and search websites such as the Better Business Bureau (BBB) for customer feedback. Doing this research can help narrow down the list of potential contractors and can provide insight into customer satisfaction. Additionally, it is important to make sure that any potential contractors are licensed and insured. This helps ensure that the contractor has the necessary qualifications to complete the job safely and correctly. Checking licenses and certifications is the next step in finding a reliable ac repair company.

Checking Licenses And Certifications

After researching local companies for air conditioning repair services, the next step is to check the licenses and certifications of any potential contractors. This can be done by checking with the Texas Department of Licensing and Regulation. The contractor’s license should be up-to-date and in good standing. Additionally, it is important to ask potential contractors if they are certified by a particular manufacturer or have any specialized certifications that may be applicable to their work. This will ensure that the contractor is qualified to do the job and has appropriate knowledge of the specific type of equipment being worked on. Furthermore, it is important to verify insurance coverage prior to allowing any work to be performed. Doing so will protect both parties from liability in case of an accident or damage during repair efforts. Having this information ensures that the contractor has taken measures to protect their customers’ investments by ensuring their own safety and that of their workers. After confirming all necessary credentials, it is time to move on to reading reviews and testimonials from past customers about each potential air conditioning repair company before making a final decision.

Reading Reviews And Testimonials

Reading reviews and testimonials is a great way to gain insight into the experiences of past customers. It is important to take the time to read through reviews and see what people are saying about the company. Many air conditioning repair companies have online reviews on their websites, but it is also worthwhile to search for independent reviews on sites such as Yelp, Facebook or Google Reviews. It can be helpful to look for trends in the reviews, such as whether most customers appear to be satisfied with the job or not. Pay particular attention to negative reviews, as these can provide useful information about how a company handles unsatisfied customers. Additionally, ask friends and family if they have had any experience with a particular air conditioning repair company and what their experience was like.

By researching customer experiences, it is possible to determine which air conditioning repair companies offer quality service at an affordable price. Moving forward, it is necessary to ask prospective companies some key questions in order to assess whether they will be able to adequately meet one’s needs.

Questions To Ask Prospective Companies

When searching for an air conditioning repair company, it can be likened to a treasure hunt – you must do your research, ask the right questions, and explore all of the possibilities in order to find the right fit. Asking questions during the search process will help you to determine which company is reliable and trustworthy. Here are some important questions to ask prospective companies:

What kind of experience does the company have? Ask for references and check reviews online. It is important to know what kind of reputation a company has before hiring them. Additionally, inquire about their certifications and licenses. Do they have any specialties? How long have they been in business?

By asking these questions, you can gain insight into the level of expertise that a company offers and ensure that you hire the most qualified professionals for your air conditioning repair needs. Moving on from here, requesting estimates and comparing pricing should come next in order to make an informed decision on who to hire.

Requesting Estimates And Comparing Pricing

Before hiring an AC repair company, homeowners should request estimates from multiple sources and compare prices. By doing this, they can get a good idea of the market rate for the service and ensure that they are not overpaying. When receiving estimates, homeowners should ask for details about the parts being replaced and the labor costs associated with the job. They should also inquire about any additional services or fees that may be included in the final cost. Additionally, asking whether the company offers discounts or promotions could result in cheaper services. Once all of the estimates have been collected, they should be compared to one another to determine which company is offering the best deal or value for money.

Warranties & Guarantees

When it comes to warranties and guarantees, it is important to get the details from the AC repair company. Most companies offer some type of warranty on their parts and labor and will vary in length. Inquire about any additional coverage or guarantees that may be available for specific services or repairs. Be sure to ask if there are any limitations or exclusions associated with the warranty or guarantee so that you know exactly what is covered. Additionally, find out how long the company has been in business and what kind of customer service they provide. A reputable AC repair company should have a good track record of providing quality services and standing behind their work. Ask for references from past customers who have used their services to ensure you are making an informed decision when hiring an AC repair company.

Conclusion

Finding the right air conditioning repair company can be an intimidating task. With so many companies to choose from, it can often feel like a challenge to find the one that will meet all of your needs. Yet, with some careful research and due diligence, one can find a reputable and qualified air conditioning repair company who will provide excellent service at a reasonable price.

First and foremost, researching local companies is essential for ensuring that the technician is properly trained and certified for work on your particular type of unit. Additionally, reading reviews and testimonials from prior customers is a great way to get an idea of how satisfied others have been with their services. Furthermore, questions should be asked to prospective companies in order to ascertain important details such as warranties and guarantees or even emergency services. Lastly, requesting estimates from multiple companies and comparing pricing should also be done in order to ensure that you are getting the best value for your money.

Overall, if one takes the time to conduct thorough research when selecting an AC repair company they will be rewarded with outstanding service unparalleled by any other provider in the area. Such a company will not only provide top-notch services but also provide them at an affordable price point making them truly unbeatable at what they do!

Thank you for taking the time to read this blog post on AC repair. At Dallas Heating and Air Conditioning, we are committed to providing you with the best possible service for your AC needs. If you are experiencing any issues with your AC unit, don’t hesitate to give us a call. Our team of experienced technicians is ready to diagnose and repair any problems you may be having. Contact us today to schedule your appointment and keep your home cool and comfortable all year round.

Who Makes Each Brand of Air Conditioner?

“You never know what you have until it’s gone.” Have you ever been stuck in the summer heat with no air conditioning? It can be a miserable experience. Many people around the DFW metroplex are confused with the plethora of HVAC brands to choose from. Knowing which company manufactures each type of AC unit is important for many reasons, such as understanding its components and how to repair or replace them. Some brands of AC units are made by the same company, even on the exact same assembly line! In this article we will explore who makes each brand of air conditioner so that you can make an informed decision about which one best suits your needs.

When it comes to residential HVAC systems, there are many brand names available. However, did you know that these brands are owned and manufactured by just a few companies?

List of Top Manufacturing Companies in the Air Conditioning System Industry

Here is a list of the major brands that are available to homeowners in the USA, and who owns the brands:

  • Carrier Corporation owns Carrier, Bryant, Arcoaire, Comfortmaker, Day & Night, Heil, Payne, and Tempstar.
  • Trane Technologies owns American Standard, Trane , Oxbox, and RunTru.
  • York owns York, Coleman, and Luxaire.
  • Rheem Manufacturing owns Rheem and Ruud.
  • Daikin owns Goodman, Amana, and Daikin.
  • Nortek Global owns Maytag.
  • Lennox makes its namesake brand Lennox.
  • Electrolux owns Frigidaire.

Air conditioners come in various models from different brands. Each has their own advantages and disadvantages, making it difficult to decide on the right one. To help narrow down your choices, it is essential to understand more about the companies behind these products and why they may stand out compared to other options available. We’ll dive into some of the major players in the industry today and look at what sets them apart from others when it comes to quality and reliability.

Finally, we’ll take a closer look at popular features offered by each manufacturer and discuss what customers should consider before investing in an AC unit. By examining all aspects of each brand thoroughly, readers will gain valuable insight into choosing a product that fits their individual lifestyle needs while also providing comfort during hot weather days without fail!

Carrier Corporation

Carrier Corporation is the driving force behind a cool breeze of comfort in any home. It’s like an oasis of relief from sweltering summer days, creating refreshingly crisp air that can be enjoyed no matter what room you’re in.

When it comes to air conditioner brands, Carrier leads the way with their top-of-the-line technology and quality performance for both commercial and residential use. Their dedication to excellence has earned them the trust of customers across the globe who rely on their products to keep them comfortable all year round.

Trane Technologies

It’s ironic that the company that keeps us cool in the summer is so hot right now. Trane Technologies, an American manufacturer of air conditioners and heating systems, has been making its mark on households across the nation for years. In fact, they’re arguably one of the most popular brands around!

Their products are known for being reliable and energy-efficient, as well as providing superior comfort levels compared to other models on the market. Not to mention, their customer service team is second to none when it comes to helping consumers find exactly what they need for their home or business climate control needs. All this makes them a great choice if you’re looking for a dependable brand of air conditioning unit.

Trane and American Standard are Almost Identical

Up until recently, both American Standard and Trane units were built in the same factory, on the same assembly line. The only differences – literally – were the color of the exterior metal enclosure, the label, and sometimes the weather top that was added to Trane models. Everything inside was identical, and purely a branding exercise.

York

Year-round, this renowned brand provides promising performance and peacefulness to any environment. With decades of experience crafting comfort systems, York focuses on fashioning forward-thinking cooling solutions that are tailored to meet modern needs. Their innovative engineering is backed by leading warranties and advanced features like whisper quiet operation and high energy efficiency ratings. York offers an expansive selection of models with varying sizes and capacities so you’re sure to find one perfectly suited for your home or office space.

Rheem Manufacturing

Rheem Manufacturing is a global leader in air conditioner production, with over 100 years of experience. Last year alone, they produced more than 4 million units for the US market alone.

The brand has become synonymous with quality and reliability due to their cutting-edge technology and high standards when it comes to product testing. Rheem also offers a wide range of models so there’s something for everyone—from budget options to top-of-the-line models that deliver superior performance. With an impressive selection of features like energy efficiency ratings up to 20 SEER, quiet operation, and powerful cooling capacity, Rheem air conditioners are sure to keep any home comfortable all summer long. Plus, their warranty policies provide peace of mind that your investment will be protected should anything go wrong down the line. All these factors make Rheem one of the best brands available on the market today.

Moving forward from this point, we’ll take a look at another major player: Daikin.

Daikin

Similar to a cool breeze on a sweltering summer day, Daikin offers relief from the hot and humid conditions associated with air conditioning. The company has been an innovator in home cooling systems since the early 1920s, when it was founded by Akira Yamada in Osaka, Japan. By creating efficient solutions that employ cutting-edge technology, including inverter compressors, Daikin can provide customers with exceptional comfort whatever their needs may be.

The brand is well-known for its high-quality products such as split system air conditioners, wall mounted units and ducted air Conditioning Systems. Furthermore, they offer eco-friendly models which use natural refrigerants instead of hydrofluorocarbons (HFCs) making them more energy efficient than most other types of AC units available today. In addition, their state-of-the-art designs are aesthetically pleasing without compromising performance or durability; they also come with warranties to protect against any defects or malfunctions. All in all, Daikin provides an array of reliable options that bring much needed respite during those unbearably hot months of the year.

Nortek Global

Nortek Global is a leading provider of air conditioners, and they have been in business for over sixty years. Their products are reliable and energy efficient, offering homeowners the ability to save money on their monthly utility bills. Here are five benefits that come with choosing Nortek’s solutions:

  • They offer customized options so you can find an air conditioner that fits your needs perfectly;
  • With cutting-edge technology, these systems provide optimal cooling power while still being quiet;
  • The filters included with each unit help create purified air quality inside the home;
  • Easy maintenance keeps operating costs low; and
  • Proactive alerts let you know when something isn’t working correctly before it turns into a bigger issue.

Overall, Nortek Global offers high-quality air conditioning systems that will keep your home comfortable during those hot summer months. Plus, their commitment to customer service ensures any issues or questions can be quickly addressed. From installation to annual checkups, Nortek has you covered—so you can always feel confident about your system’s performance. Now onto Lennox…

Lennox

Lennox is a leading manufacturer of air conditioners and heating systems, with over 120 years in the industry. The company has consistently kept up-to-date with advances in technology to provide customers with efficient and cost effective solutions. Lennox provides a variety of products that can be tailored to individual needs:

  • Air Conditioners: Lennox offers several different models of air conditioning units, including central air systems, ductless mini splits, packaged terminal air conditioners (PTACs), geothermal heat pumps, hybrid systems, and more. All their ACs are designed for optimal energy efficiency and come with features such as variable speed motors for improved temperature control.
  • Heating Systems: Lennox also manufactures furnaces, boilers, heat pumps, and other heating systems that use natural gas or propane fuel sources. They have an array of options available ranging from traditional forced-air models to high-efficiency condensing ones which use less power while still providing excellent comfort levels.

Overall, Lennox strives to create reliable equipment that will last through many years of use by its customers. Their commitment to quality combined with their wide selection of products make them a great choice for anyone looking for an air conditioning or heating system solution. With this level of expertise at hand it’s no wonder why so many people trust the name “Lennox” when purchasing their HVAC needs.

Electrolux

Electrolux is a Swedish company that produces air conditioners for both residential and commercial use. The brand has been around since 1919, when it was founded by Axel Wenner-Gren. Electrolux strives to stay ahead of the game in terms of technology, offering energy efficient models with features like temperature control and silent operation. Their air conditioners come with warranties ranging from five years up to ten years, depending on the specific model you buy. They also have a wide range of prices available so you can find one that fits your budget.

When looking into purchasing an air conditioner, be sure to consider all of the options before making a decision. Consider factors such as size, installation costs, noise level, efficiency rating and warranty coverage offered by each manufacturer. Electrolux offers good value for money, reliable performance and a long list of features – making them an ideal choice if you’re after quality cooling without breaking the bank!

Conclusion

In conclusion, air conditioner brands have a wide range of manufacturers. Carrier Corporation is known for their high-end air conditioning systems that are reliable and efficient.

  • Trane Technologies has a vast selection of top-of-the-line products that can keep any space cool in the summertime and cozy during the winter months.
  • York offers an array of options designed to fit any budget while still delivering great performance.
  • Rheem Manufacturing brings advanced technology to the market with energy efficient models built to last – perfect for those looking for long term cost savings!
  • Daikin has always been ahead of its time when it comes to innovation, creating some of the most cutting-edge air conditioning solutions available today.
  • Nortek Global makes units that are ultra powerful yet surprisingly quiet, making them ideal for homes or businesses where noise pollution needs to be kept at bay.
  • Lennox excels in providing superior comfort no matter what type of environment you’re in thanks to their innovative designs and temperature control features.
  • Electrolux rounds out this list by offering customers plenty of choices between different styles, sizes, and price points.

With such a variety of excellent choices from these leading brands, anyone can get exactly what they need no matter their preference or budget! If your existing AC system is on its last legs or you want to upgrade to a more efficient system, give the experts at Dallas Heating and Air Conditioning a call, and we’ll help you get a new system that meets your needs and budget.